Publish 360° street panoramas
The following sections describe how the visualization of 360° driving images (street panoramas) works with PlexMap Street360°.
What is PlexMap Street360°? Anchor
PlexMap Street360° is an extension of PlexMap 3D with which 360° street panorama images can be stored, processed and visualized.
With PlexMap Street360° it is possible to visualize street panoramic images together with the 3D city model and other two- and three-dimensional geodata. In addition, extensive tools are available to perform measurements in the panoramas.
To be able to display street panoramas with PlexMap, at least the apps PlexMap 3D and PlexMap Street360° must be licensed. If point clouds from a road survey are also to be visualized, PlexMap Points is also required.

Sourca data Anchor
In order to create a Layer for travel images, the following data should be available:
- Driving images as equirectangular 360° panoramas in a common image format (JPEG format or similar)
- Driving points with position (X, Y, Z) and orientation (heading, pitch, roll) as vector file (e.g. shape).
Import into the magazine Anchor
The images can be easily imported as File and are then available in the PlexMap Magazine.
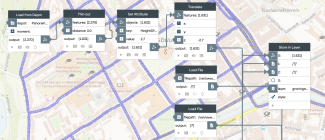
The driving points are converted into the data type "Panorama-Sphere" via an appropriate switchboard. "Panorama-Sphere" is a feature with 3D point geometry and a fixed attribute schema. For more information about the different attributes, see Panorama-Sphere.
Alternatively, a Switchboard function is available for the following format, which directly generates data of type "panorama sphere":
Create a Layer for the 360° street panormas Anchor
From within the PlexMap Magazine, the images and the points can now be saved together in a Layer of the type "spherical panoramas".
It is usually useful to thin out the data using the Thin out function, since the 360° panoramas are usually taken at short intervals during the driving tours. Without thinning out the images, navigating through the image data in the 3D viewer would be less intuitive. In the present example, a minimum distance of 3 meters to the neighboring point was defined for this purpose.
Create view with road traffic images Anchor
With the layer ready, you can now create a View for the street panoramas.
Since street panoramas are visualized within PlexMap 3D, a 3D environment should first be built for the street panoramas. This should usually consist of at least a terrain model (DTM), a 3D building model (CityGML or 3D mesh) and of course the layer for the street panoramas.
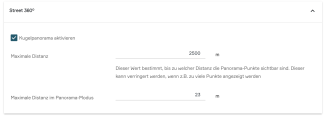
Finally, to activate PlexMap Street360° in the created view, you have to make the setting "Activate spherical panorama" in the view editor under "Tools", "Street 360°".
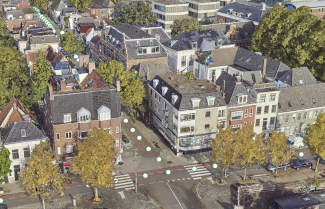
Now the street panoramas are published and can be opened in the created View by clicking on a driving point. You can navigate through the images by clicking on the next point with your mouse or finger or by using the arrow keys on your keyboard.

