Visualize drone meshes in PlexMap 3D
3D meshes out of drones data play an increasingly important role in the daily work of our users.
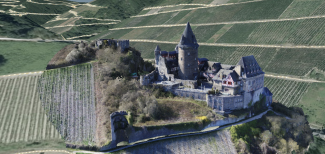
PlexMap supports the display of high-resolution drone meshes, as seen here in the example of Stahleck Castle in Bacharach (source: LVermGeo RLP/"Rheinland-Pfalz in 3D").
A particular challenge in the web presentation of drone meshes is the very large amount of data from drone meshes in a small space compared to airborne 3D meshes.
In this tutorial, you will learn how to visualize high-resolution drone meshes in PlexMap 3D.
Requirements for the import Anchor
Since drone meshes are extremely complex datasets and can cause problems when displayed in a web browser against this background, the drone meshes used should adhere to the following limits:
- The drone mesh should contain a maximum of approximately 1,000,000 triangles.
- The size of a single texture used in the drone mesh should not exceed 8,192 x 8,192 pixels.
- A guideline for the maximum size of a single 3D mesh that can be displayed in the browser is 150 MB.
- We recommend the following file formats for importing drone meshes: OGC 3D tiles, Binary glTF (.glb), Wavefront OBJ (.obj), Collada (.dae).
Crucial for the correct position visualization in space and further processing is the alignment of the coordinate axes of the mesh. Make sure that the in z axis of the drone mesh is aligned upwards.
Import settings Anchor
To import a drone mesh, create an import Switchboard and select the "Import geometry as file resource" setting in the Import 3D Meshes function.
The mesh imported this way can now be edited as usual using the available switchboard functions and placed (function Place) and rotated (function Rotate) as needed.
Finally, save the model in a depot of type Mesh. Tip: You can also save the model in your personal "Models" folder to place it interactively with the PlexMap Planner in PlexMap 3D afterwards.
Prepare 3D view for drone mesh integration Anchor
For an optimal display, the drone mesh and any 3D representation already present in the viewer should not overlap. To prevent this, you can hide the area where you want to place the drone mesh from the previous 3D representation.
To do this, create a Feature that contains the perimeter of the drone mesh. You can create this feature automatically by Outline or 2D Bounding Box. Alternatively, it is possible to manually draw the corresponding area in the PlexMap Switchboard or in the PlexMap Planner.
Now you can use the generated Feature with the function As Clipping Polygon into a Spatial-Function-Object and then store a layer with Store in Layer. A technical limitation is that the Feature must be a convex polygon.
If you now switch on the created layer in a view, the previous 3D model within the corresponding polygon is automatically hidden.
You can also save the layer with the cutout polygon together with the drone mesh layer in a group. Then the existing 3D model will be hidden only when the drone mesh layer is active.
Finally, to prevent this polygon from also hiding the drone mesh itself, the view setting "Exclude layers from clipping" can be used. To do this, enter one or more drone mesh layers in this setting.
Layer settings Anchor
To create a Layer from the now saved drone mesh, the Store in Layer function is used as usual.
Before executing Store in Layer, the option "Optimize for meshes from drone flights" must be activated in the layer settings. The Layer Settings can be accessed via the three-dot menu to the right of the Layer Name.
Troubleshooting Anchor
What to do if PlexMap does not process the uploaded drone mesh? The following checklist will help you identify possible problems.
- Can you open the drone mesh in the free software Blender? If not, please refer to Blender's error messages
- Can you export the drone mesh in Blender as a glTF? If yes, use this glTF to import to PlexMap
- Make sure the drone mesh is oriented up in Z-axis.
Refer to the "Drone mesh constraints" section and re-export the drone mesh if necessary.
If this checklist did not help you, contact our support. Please send us the links to the relevant switchboards and depots so that we can help you as soon as possible.


