Creating a Geoportal with PlexMap Portal
PlexMap Portal is a PlexMap component for building geoportals. Using the PlexMap backend, you can set up one or more geoportals. On the homepage of the geoportal, the map applications created with PlexMap are presented in a clear layout, making them easily accessible to all users. Additionally, it is possible to integrate map applications from external providers. This tutorial will show you how to build geoportals with PlexMap.
To complete this tutorial, you will need access to the PlexMap Portal component as well as at least one of the specialized applications: PlexMap 2D, PlexMap 3D, or PlexMap Oblique.
Create a new Portal Anchor
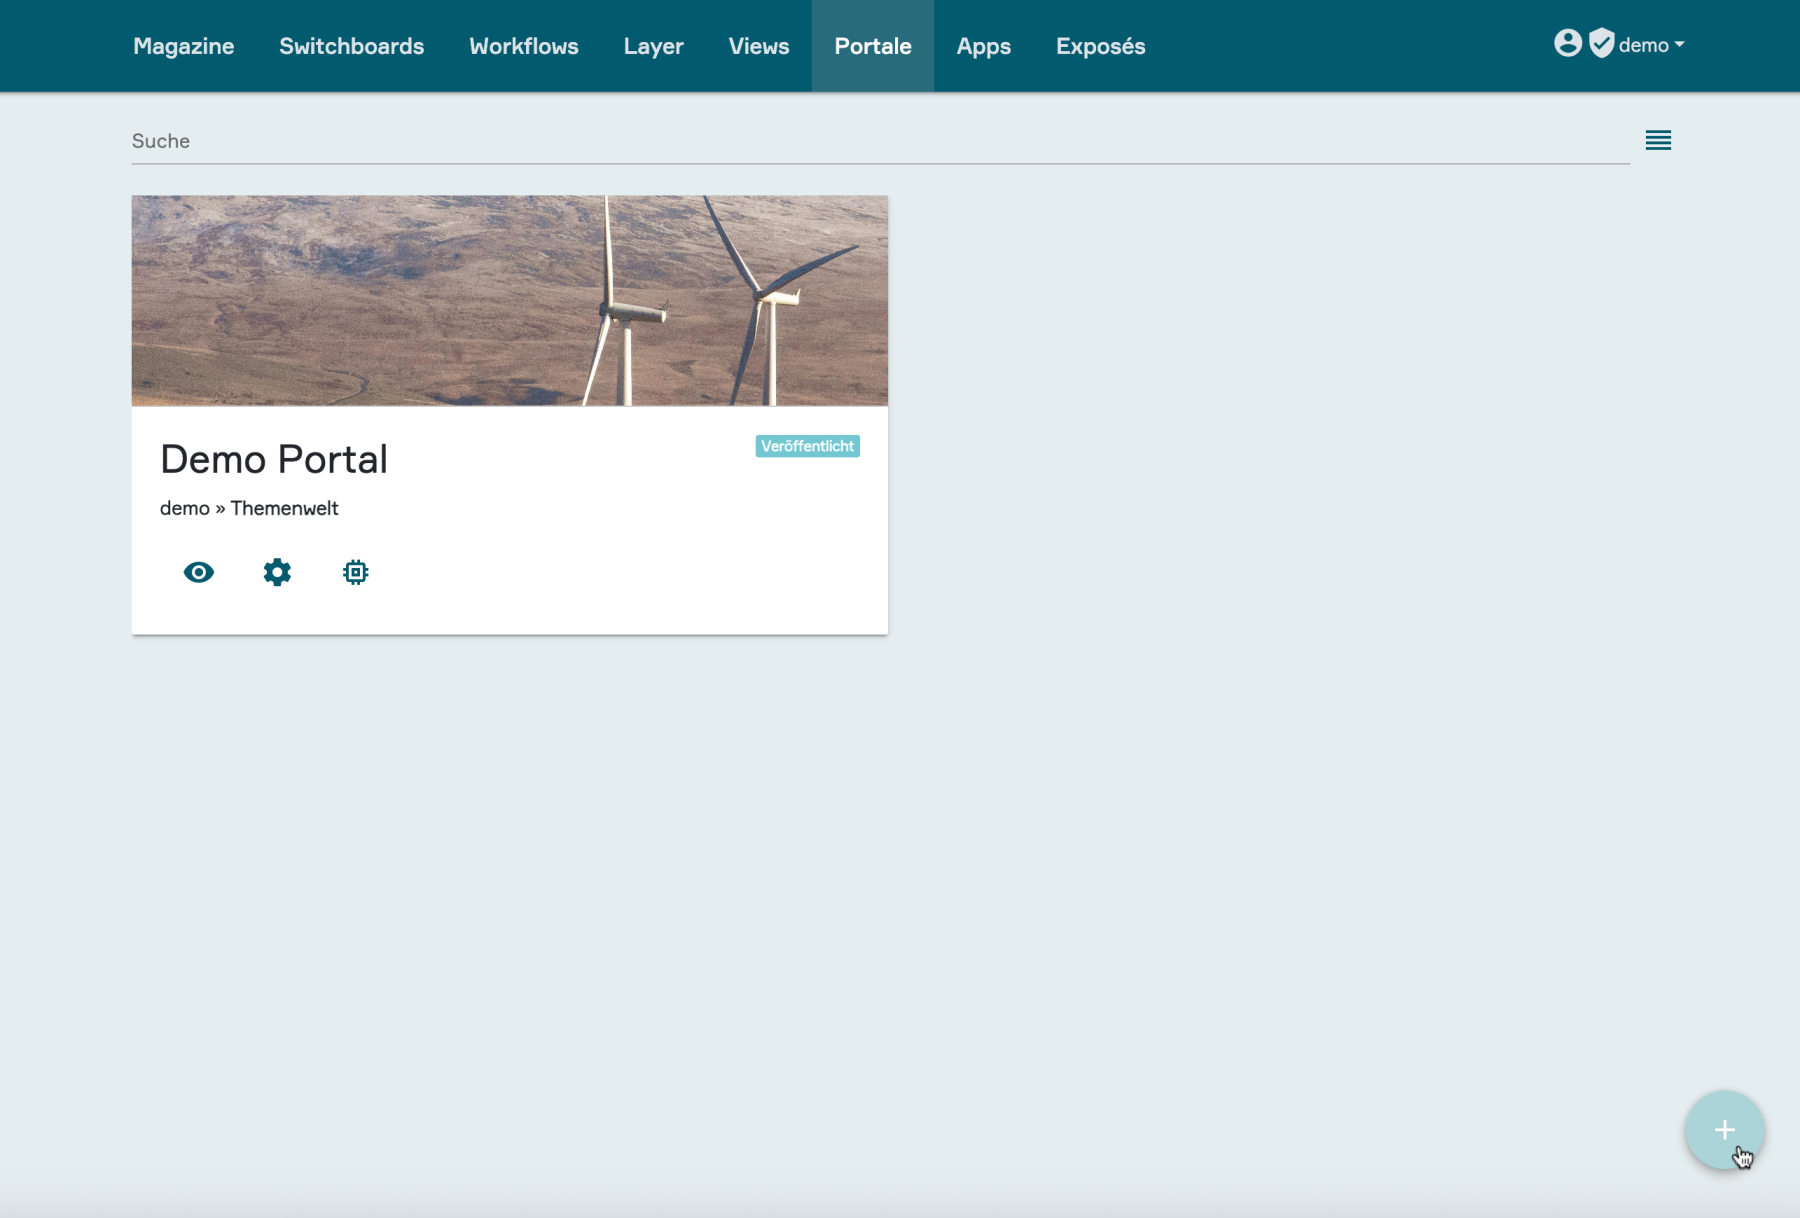
First, navigate to the "Portals" main menu in the PlexMap backend and click the plus button in the bottom right corner to create a new portal.
A pop-up window will open containing the submenus "Settings," "Views," "Layers," and "Permissions." The following chapters of this tutorial will explain the various configuration options available in each of these sections.
Config and Portal Settings Anchor
In the following chapters, you will find a detailed description of how to populate your newly created portal with content and how to customize its design. The demo portal shown here serves as a reference for the subsequent explanations.
1. Settings
Name:
Name of the portal. The name entered here will appear as the title in the top left corner of the finished portal.
Shortname:
The name entered here will become part of your portal URL.
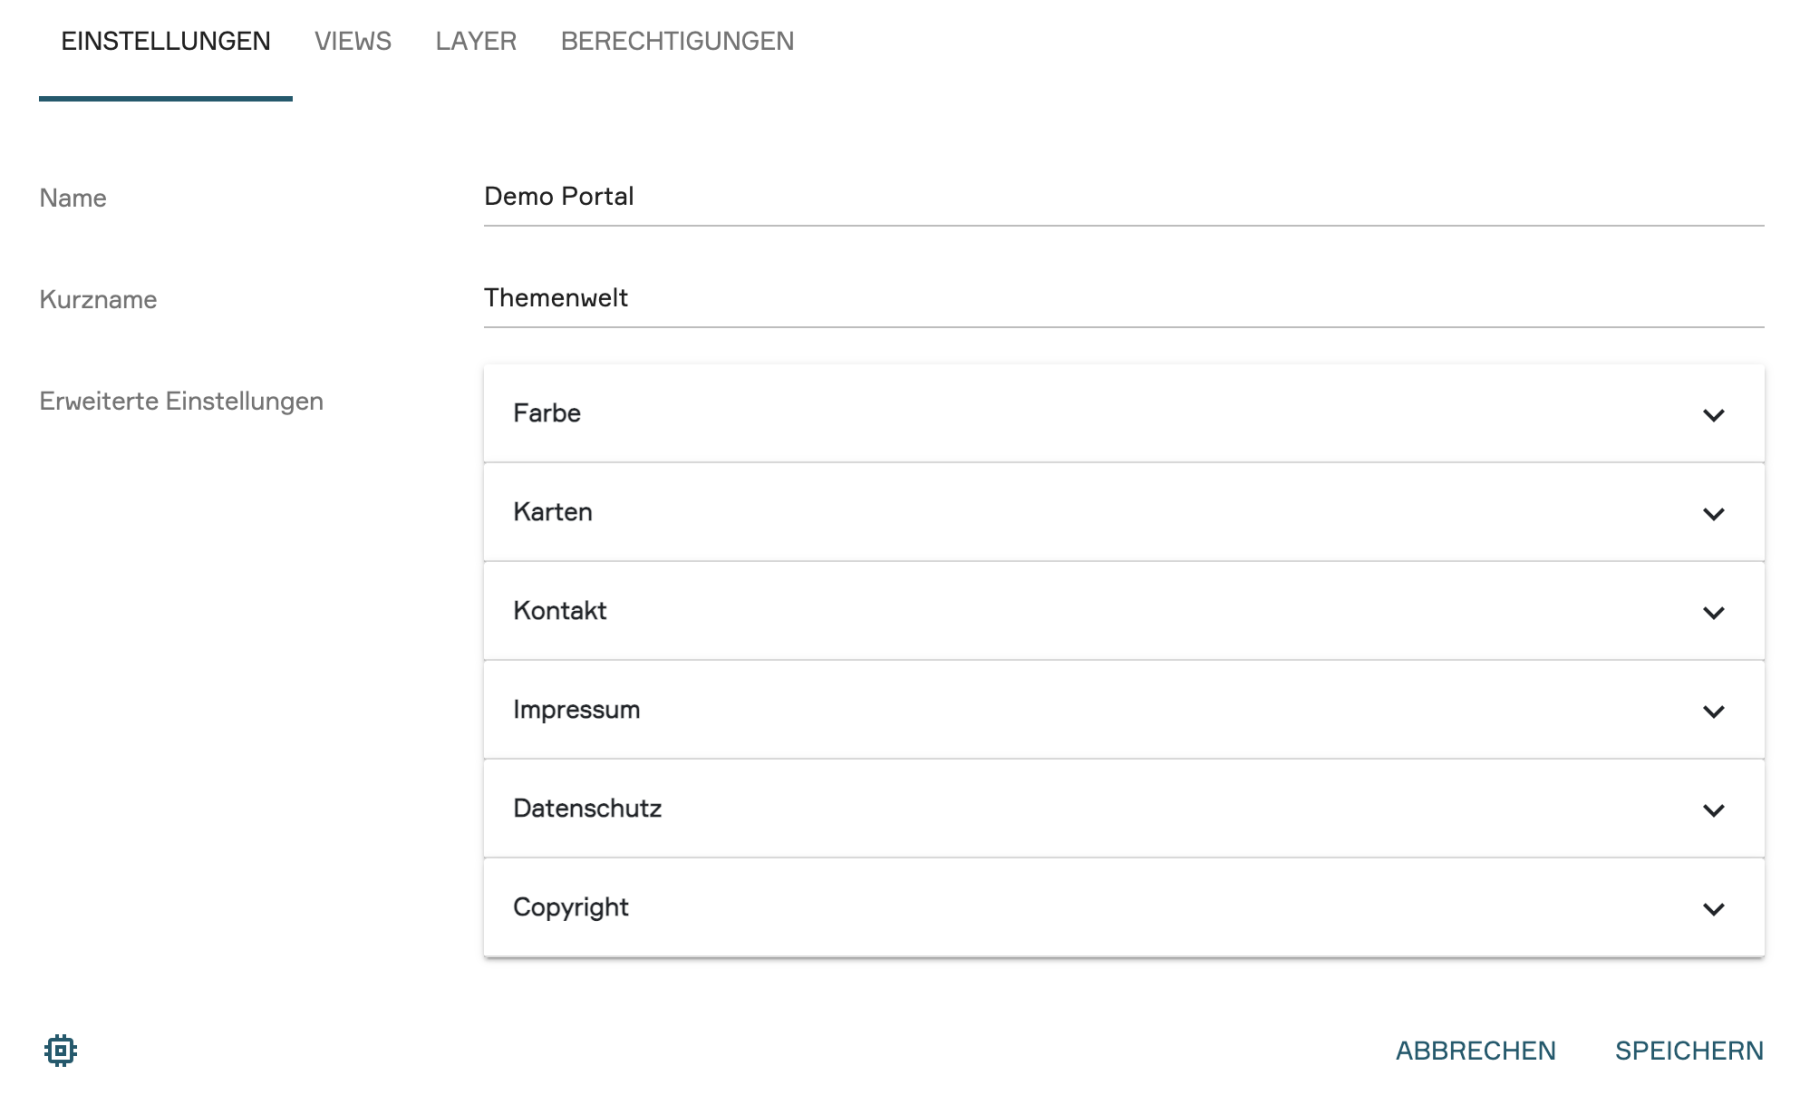
2. Advanced Settings
In the advanced settings, you can give the portal your desired appearance and add legal information as well as contact details. The advanced settings are divided into the following six sub-items:
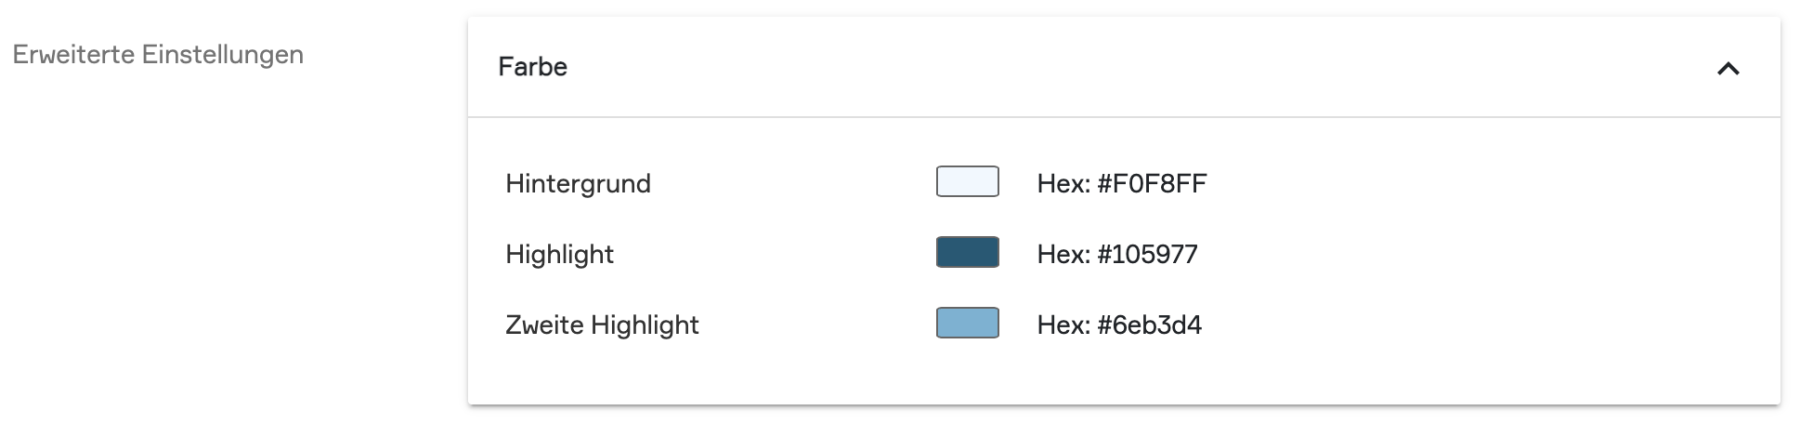
Color:
The color scheme of the portal is defined here.
Background: Defines the background color of the portal layout.
Highlight Color: Defines the background color of the main menu, the font color, the background color of buttons, and other design elements in the portal.
Secondary Highlight Color: Defines the background color in the layer search area within the "Search" portal section.
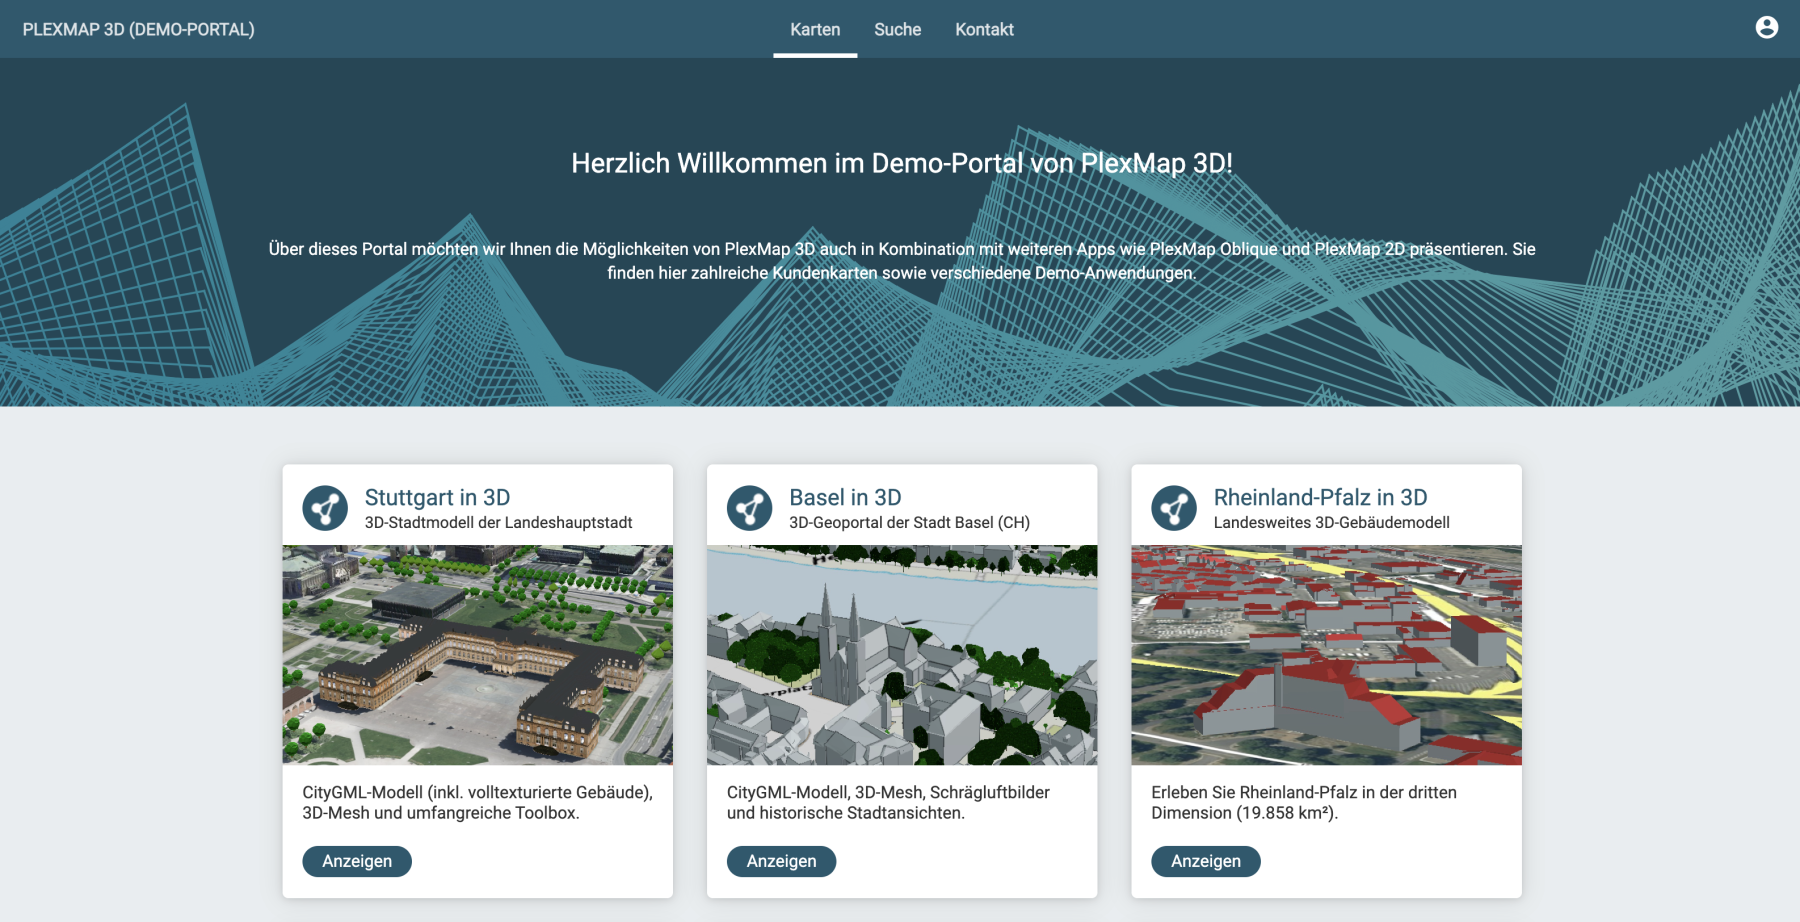
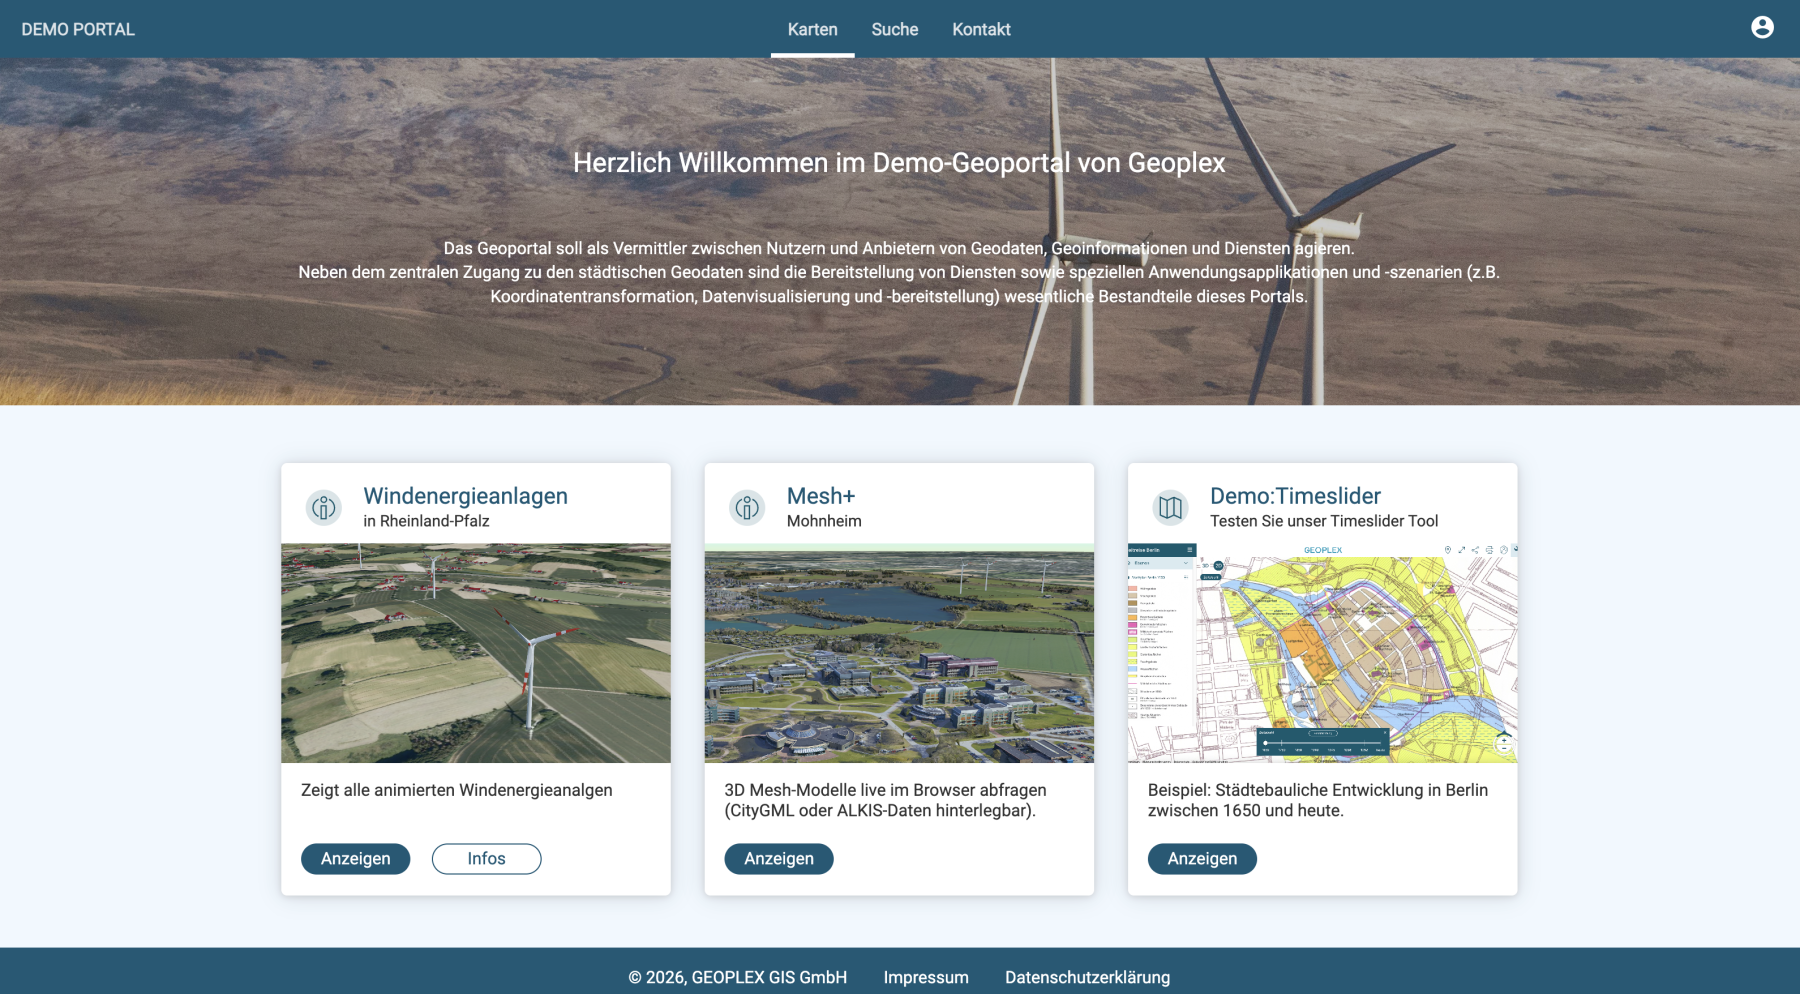
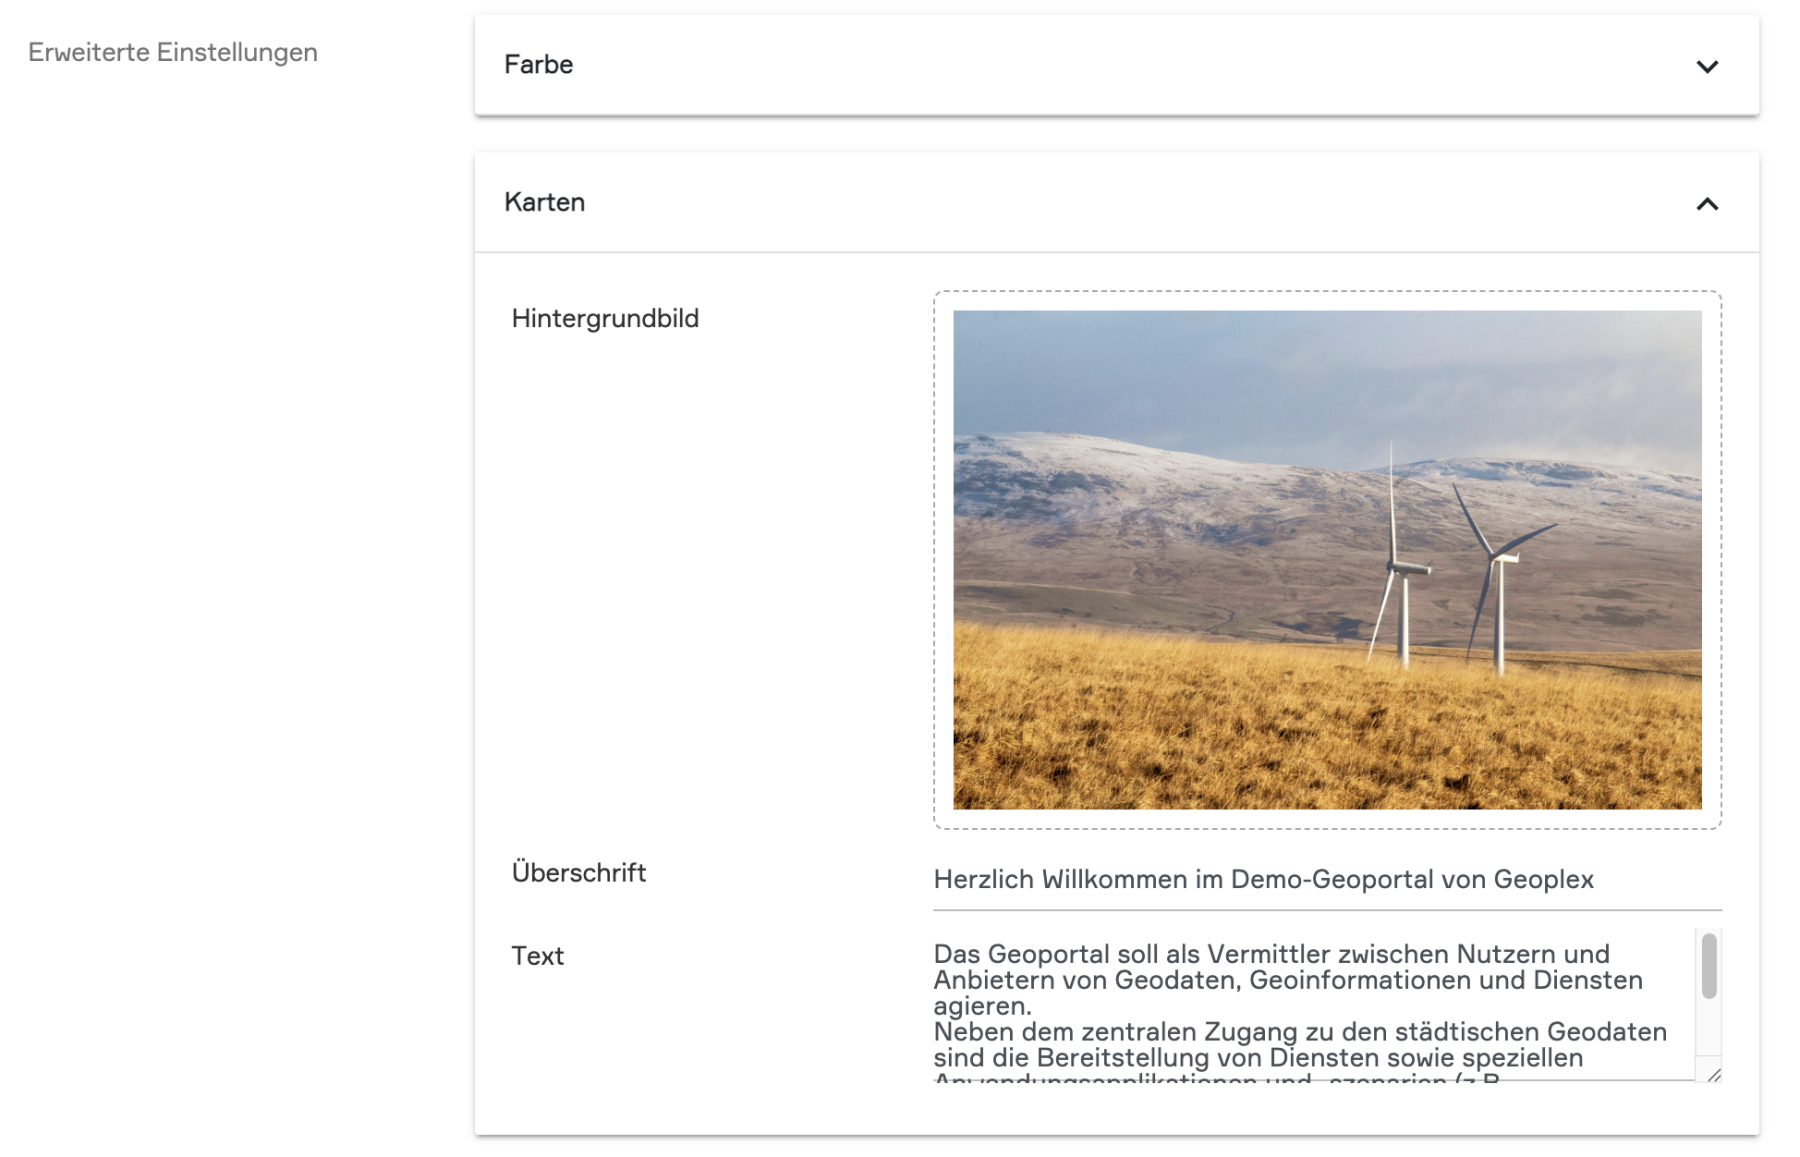
Maps:
In this section, you design the layout of the "Maps" portal chapter:
Background Image: The image set here will appear as a large-scale background at the top of the "Maps" portal chapter.
Headline: Here you can set a title for your portal, which will appear over the background image.
Text: An accompanying information text that appears under the title on the background image.
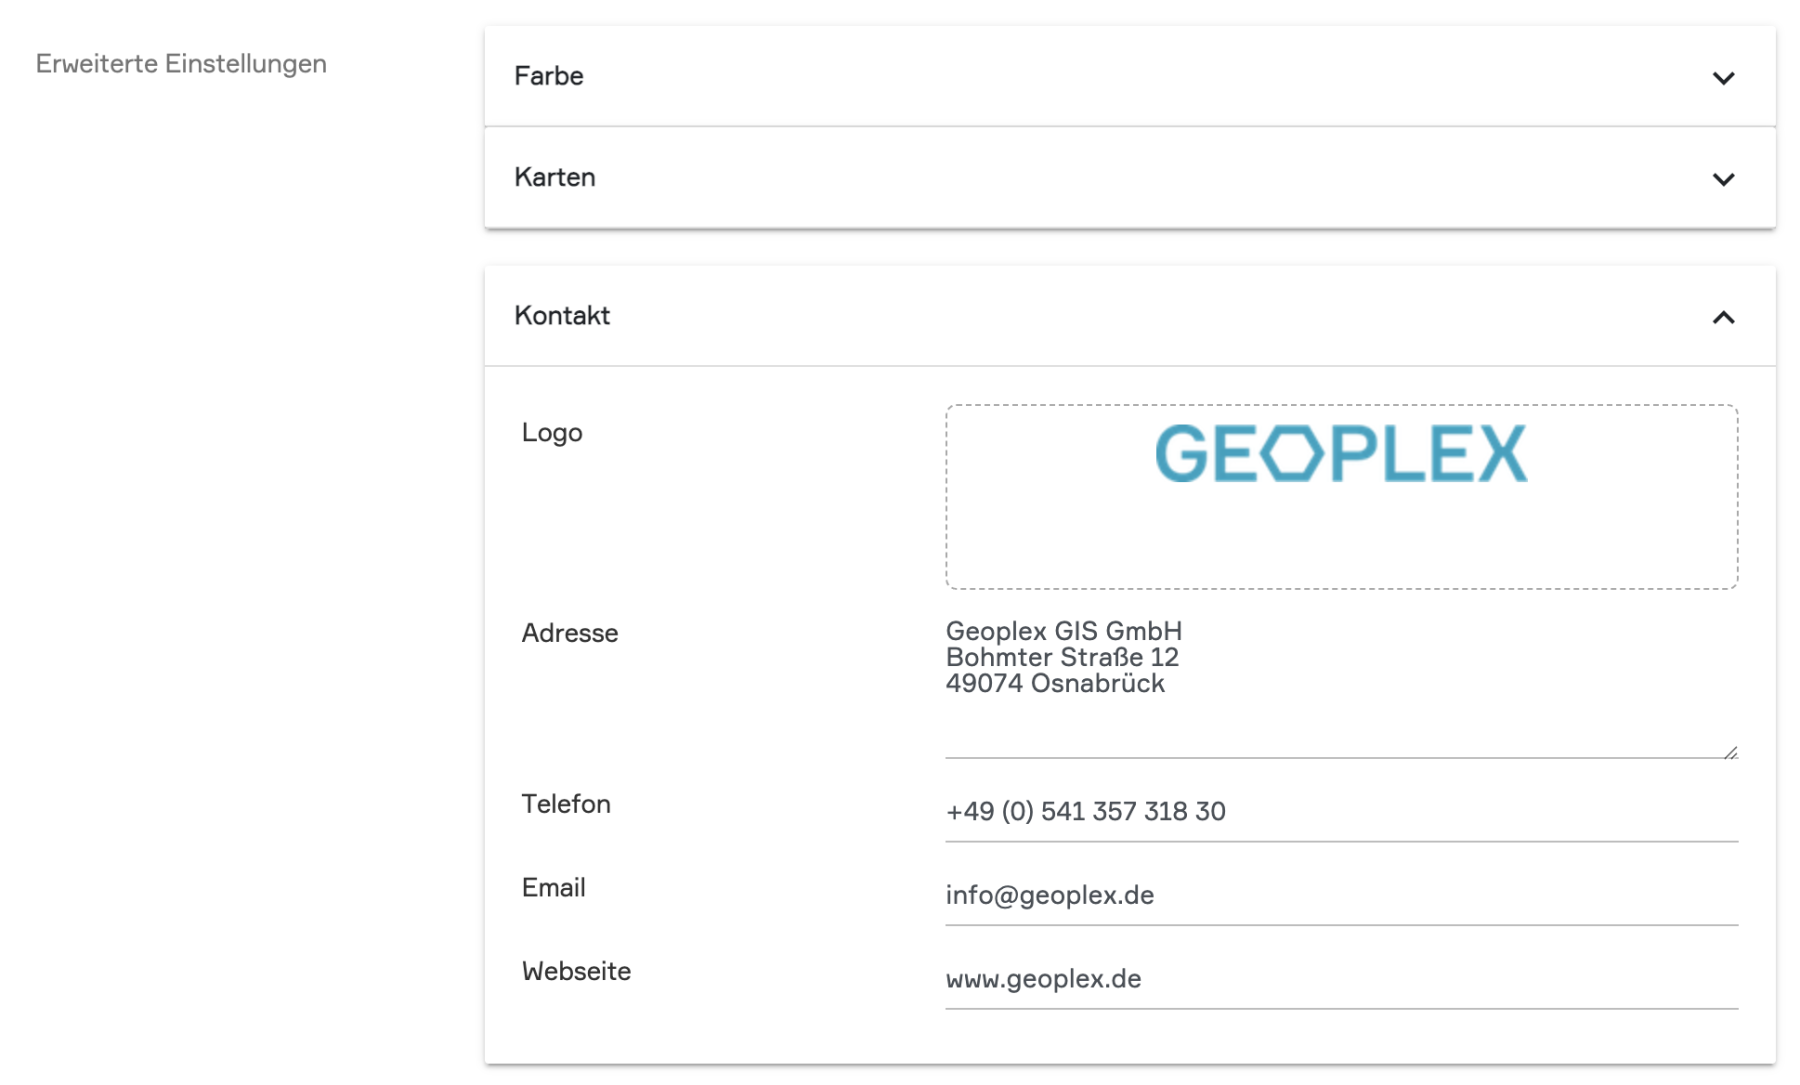
Contacts:
Here you can store central contact information for your portal. These contact details are accessed via the "Contact" portal chapter.
Logo: Here you can upload your company logo or a project logo.
Address, Phone Number & Email Address: Enter the corresponding contact details here.
Website: Enter the link to your homepage here.
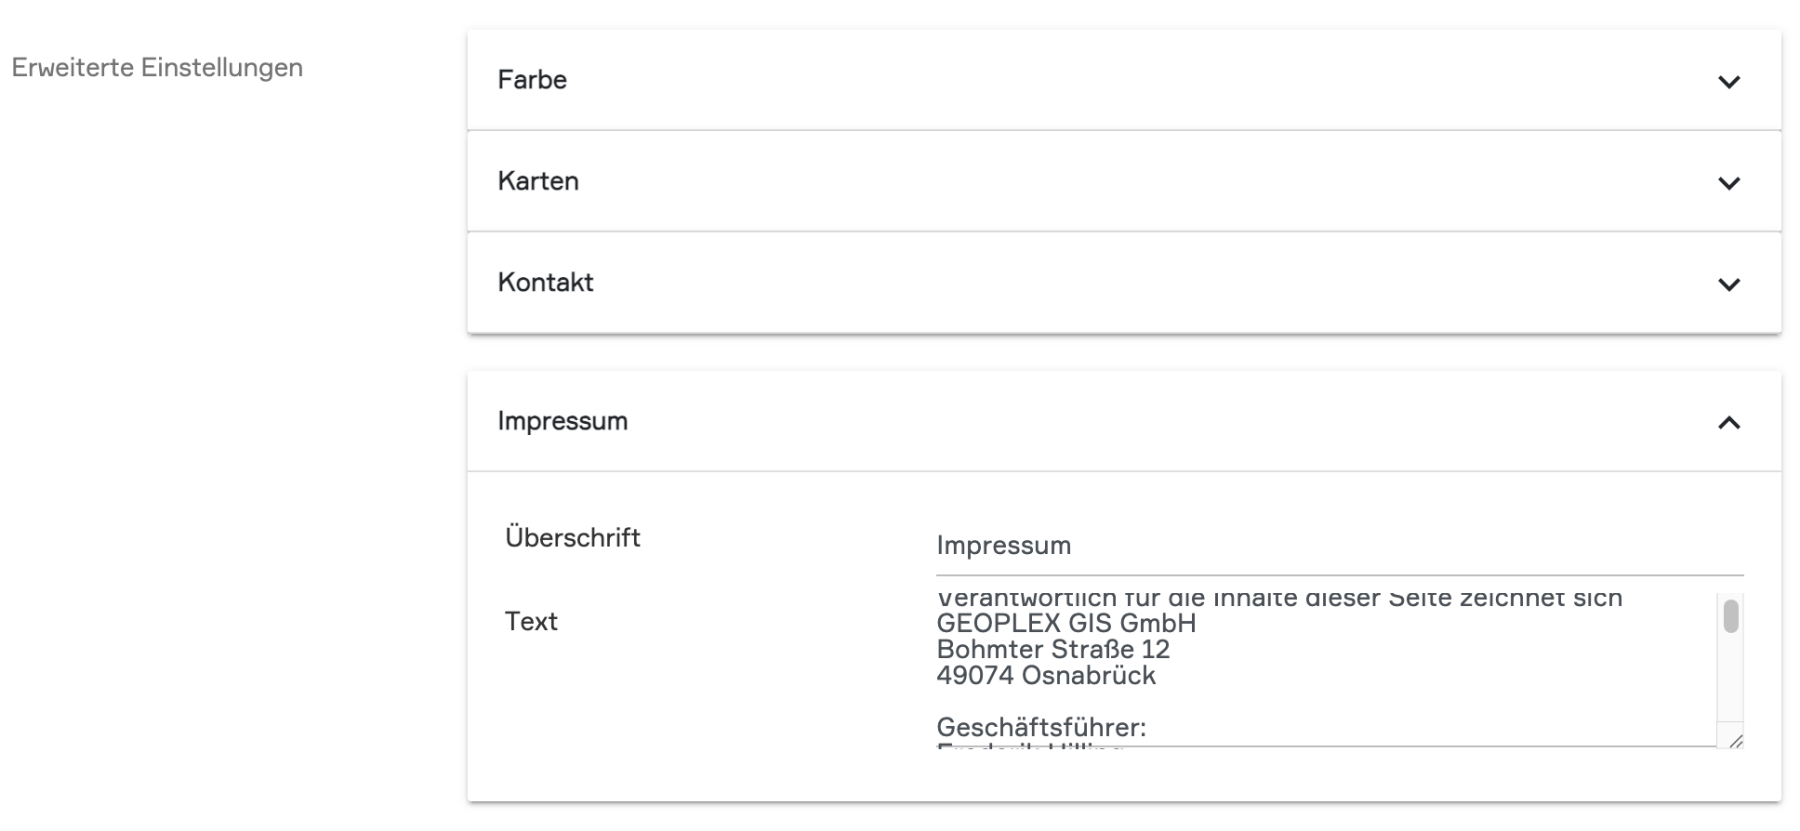
Imprint:
Here you can insert the text for your legal notice. The legal notice can be accessed in the footer of the portal via the "Imprint" button located in the center.
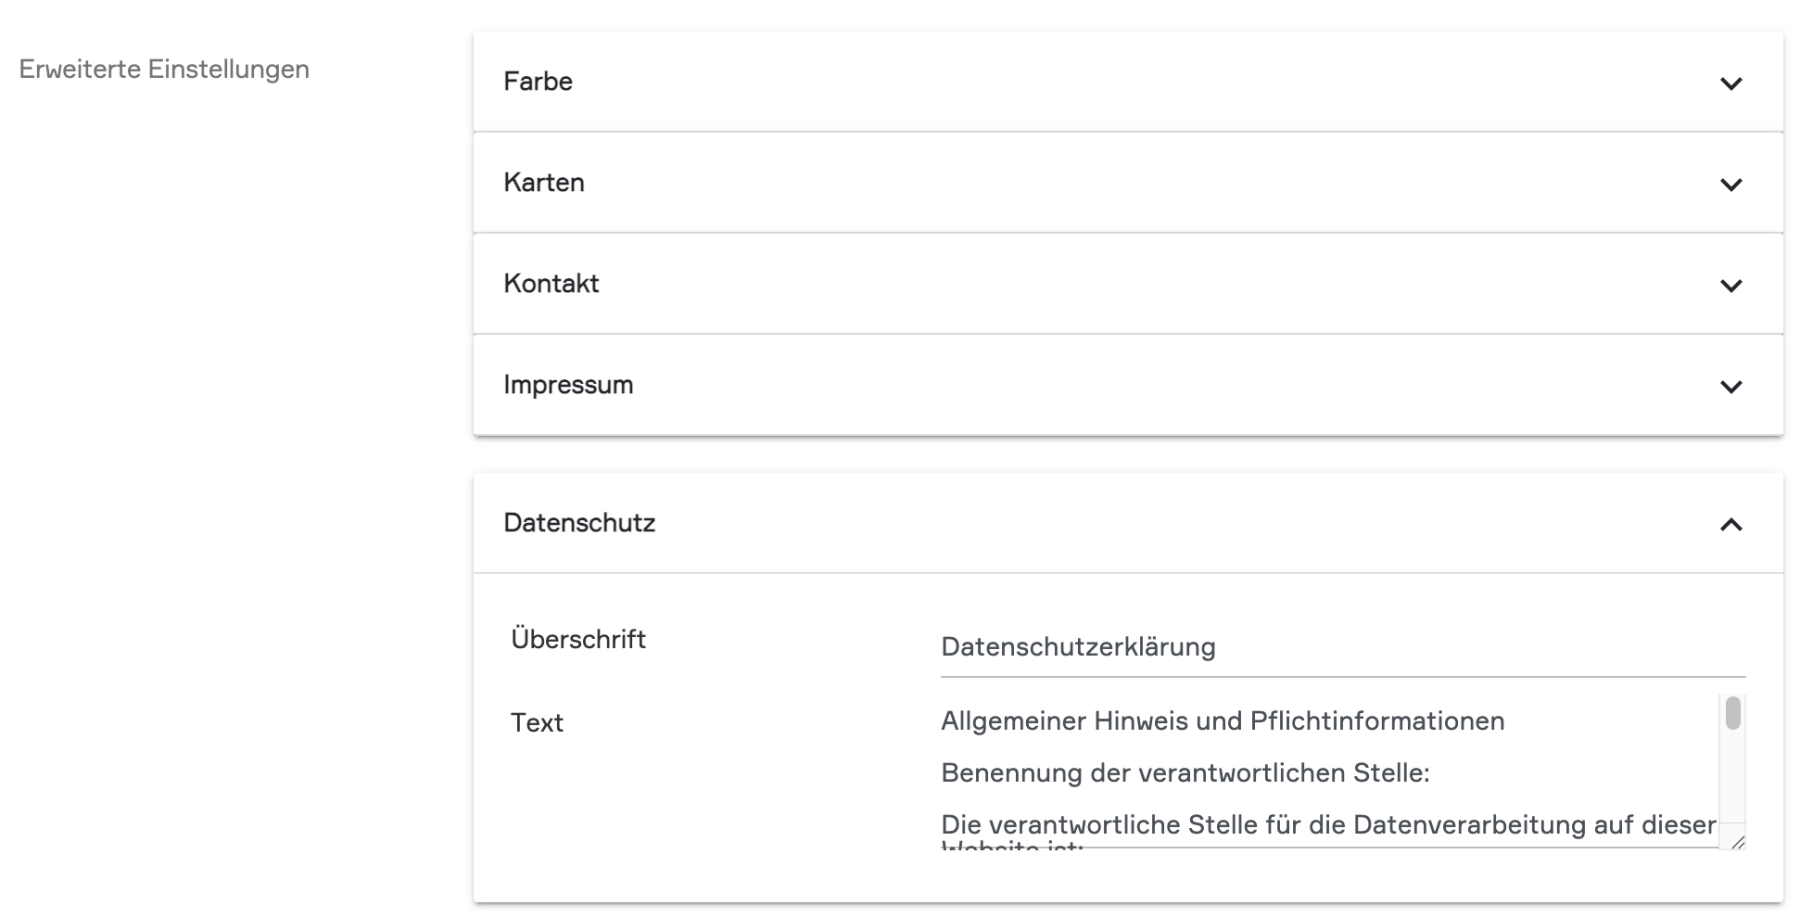
Privacy policy:
Here you can insert the text for information regarding data protection. The "Privacy Policy" page can be accessed via the corresponding button in the footer of the portal.
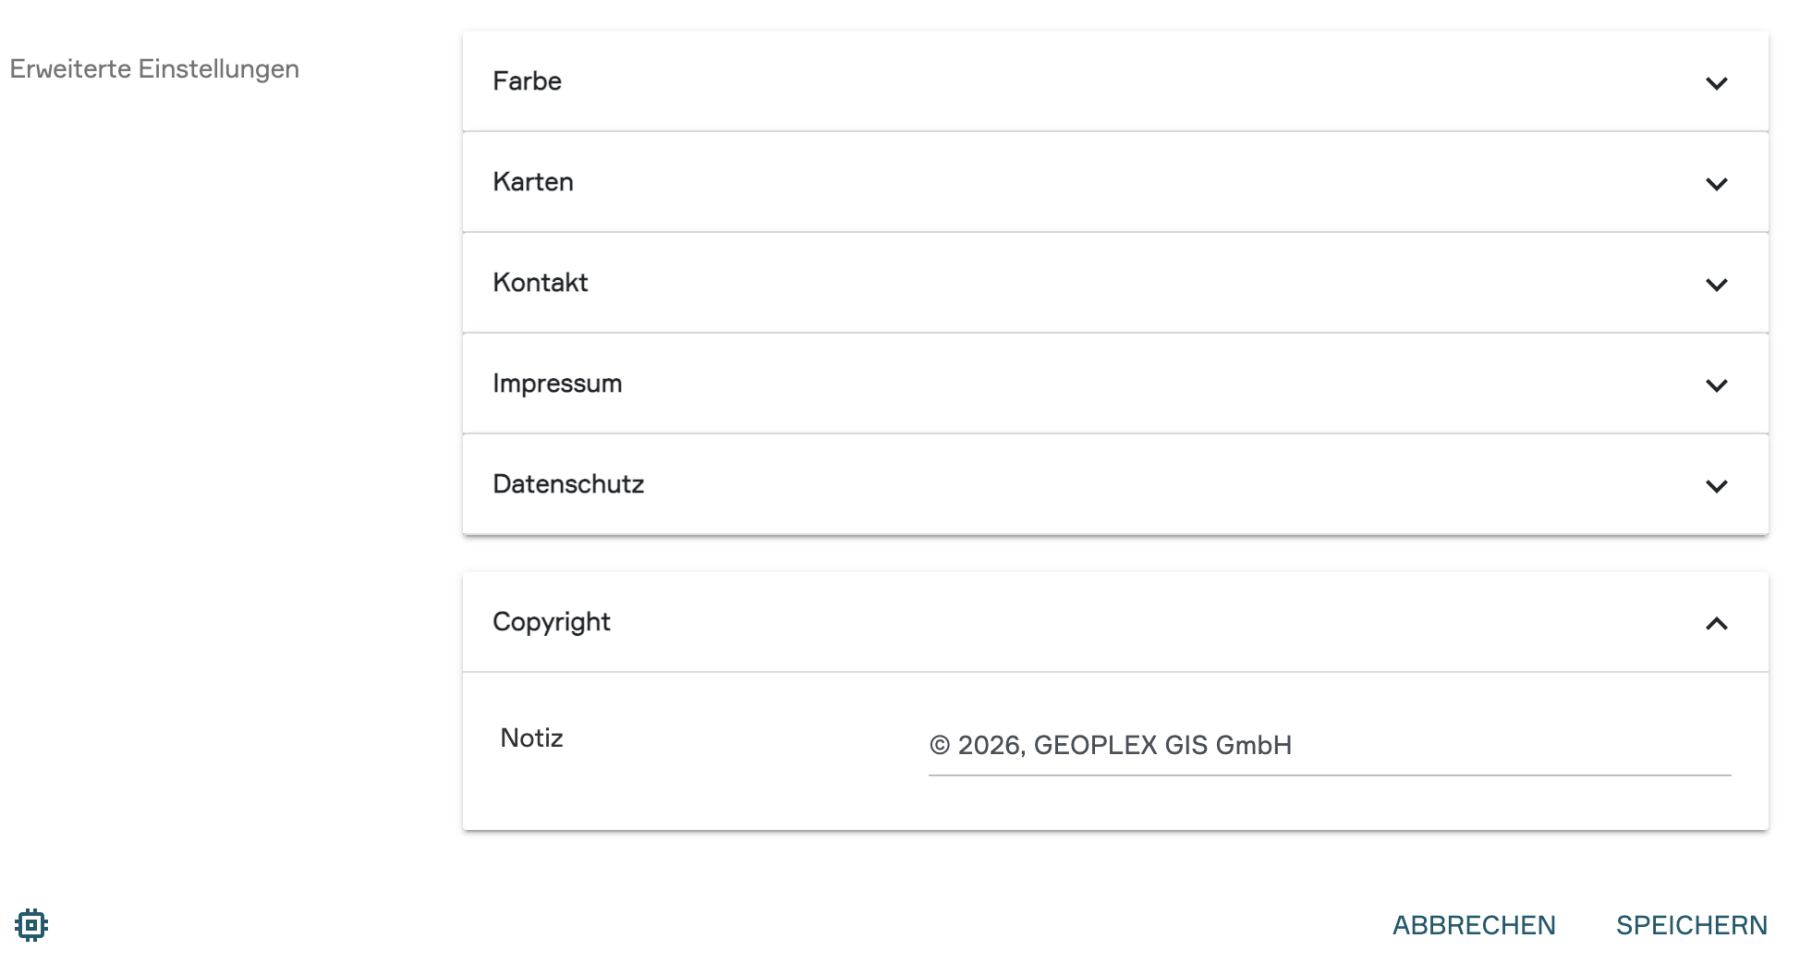
Copyright :
Here you can enter a copyright notice, for example, regarding the geospatial data used in the portal (e.g., © Data Publisher).
3. Edit internal and external Views Anchor
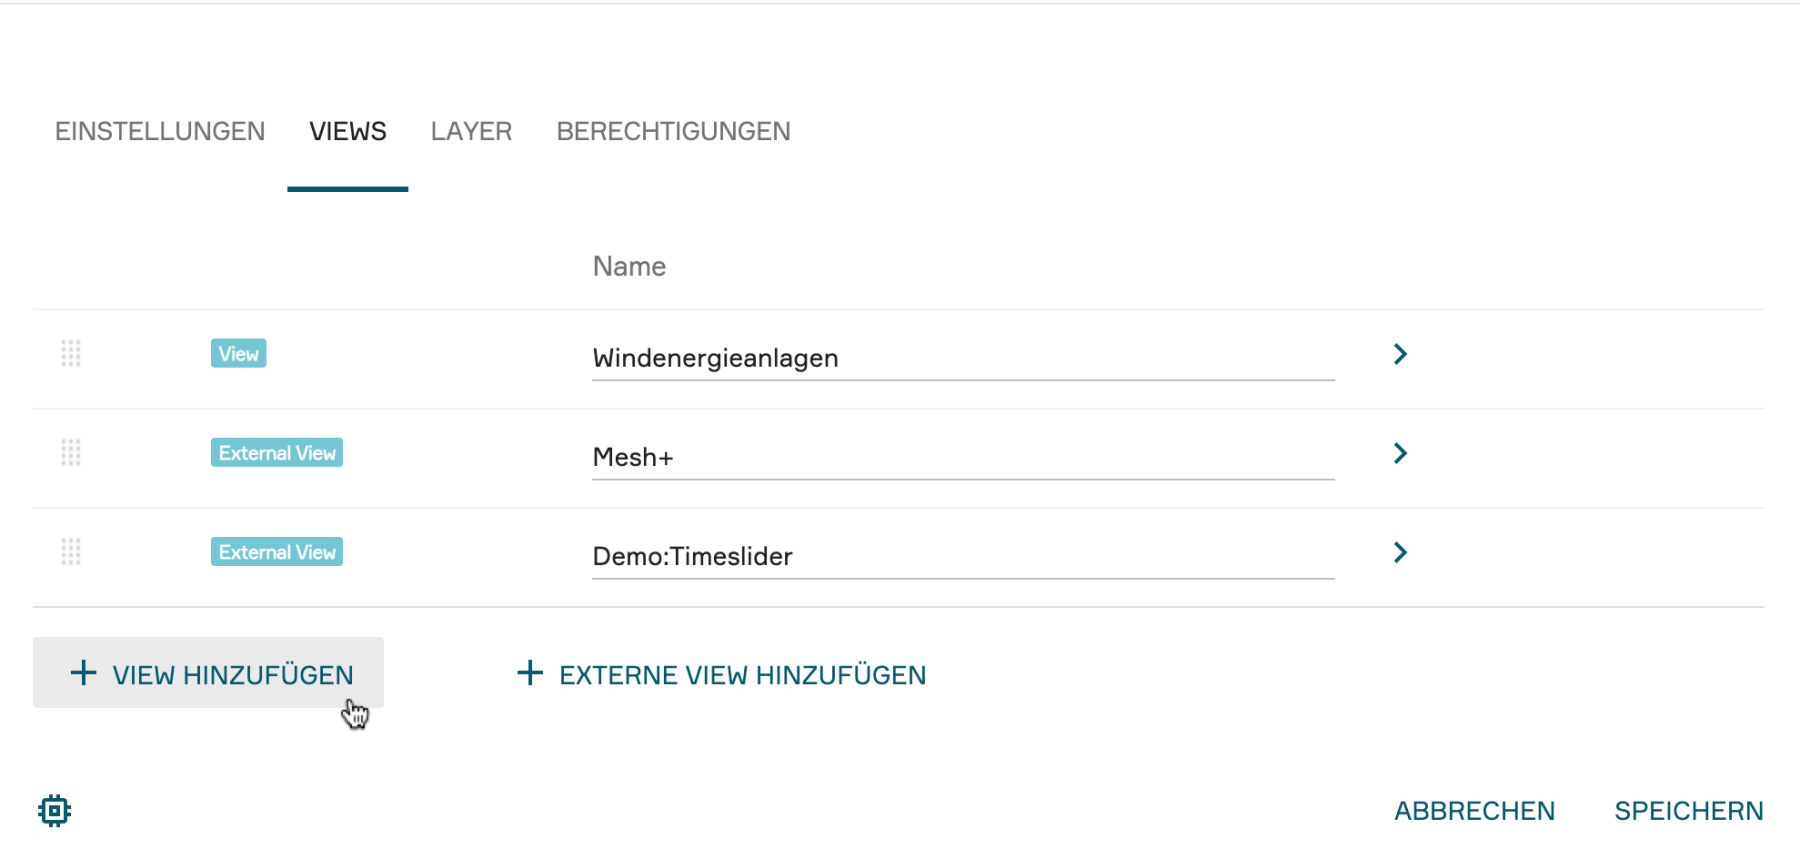
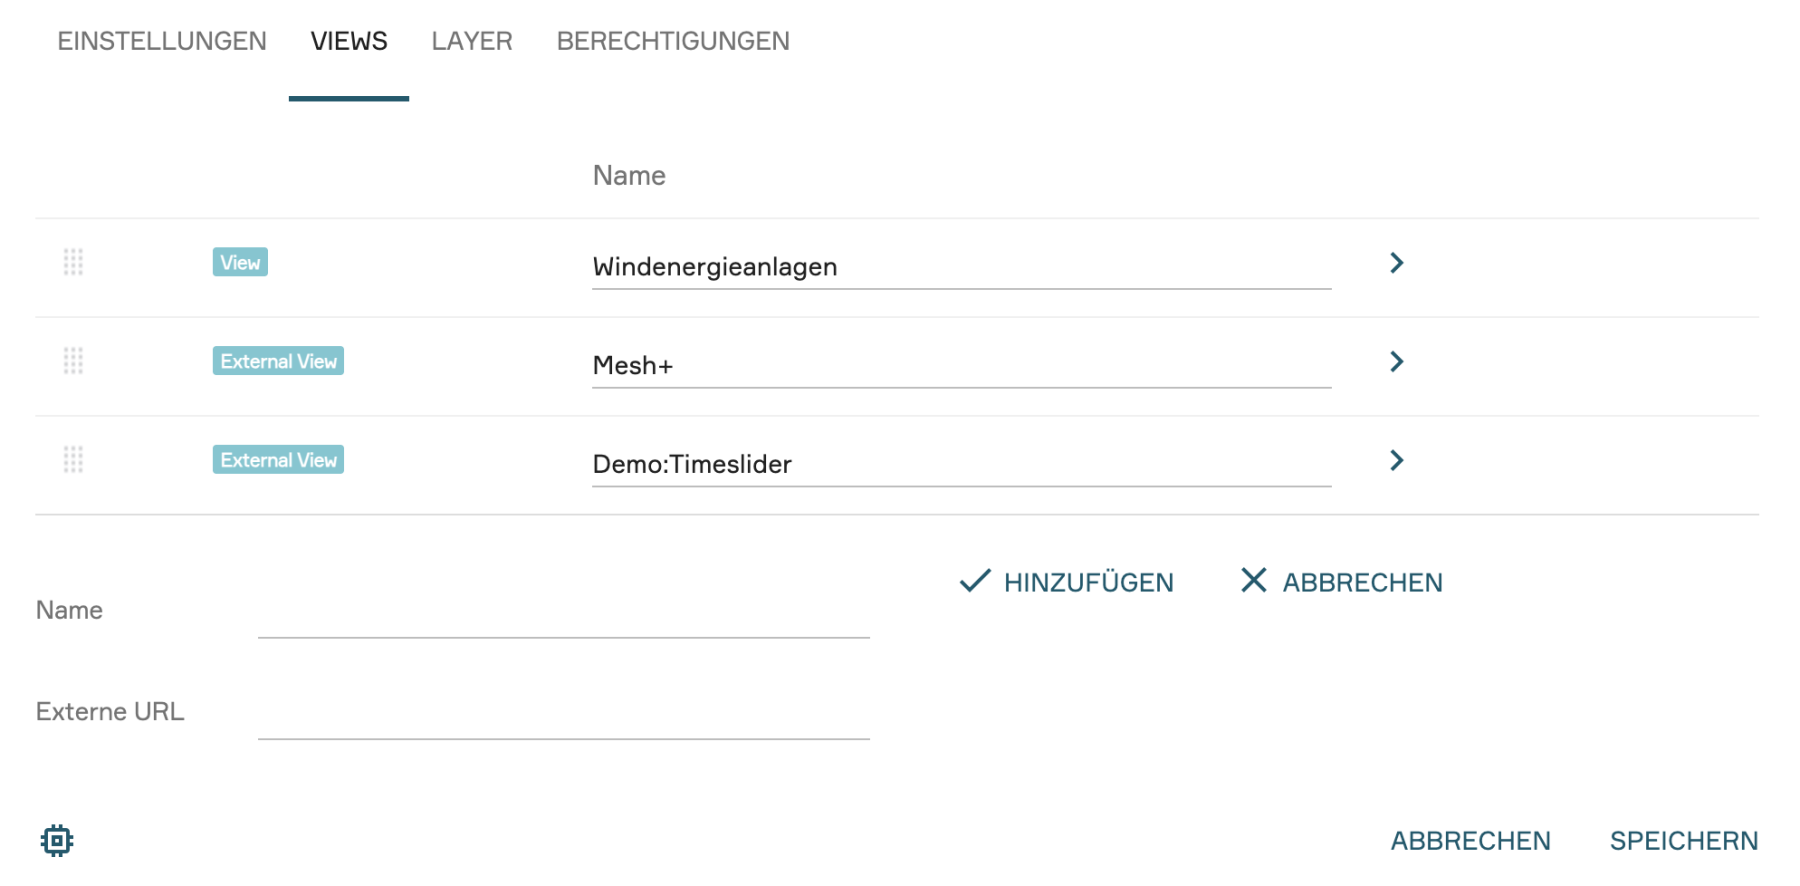
Now that the basic structure of the portal is in place, you can populate it with content in the "Views" sub-chapter. PlexMap distinguishes between internal views (views created directly in your instance) and external views (links to external map applications or other websites).
Accordingly, under the "Views" tab, you will find two buttons: "Add view" for adding an internal view and "Add external view" for adding an external map application or website.
When you click one of the buttons, a menu opens where you can configure various settings. All possible settings are described in the following two sub-chapters.
Edit internal View
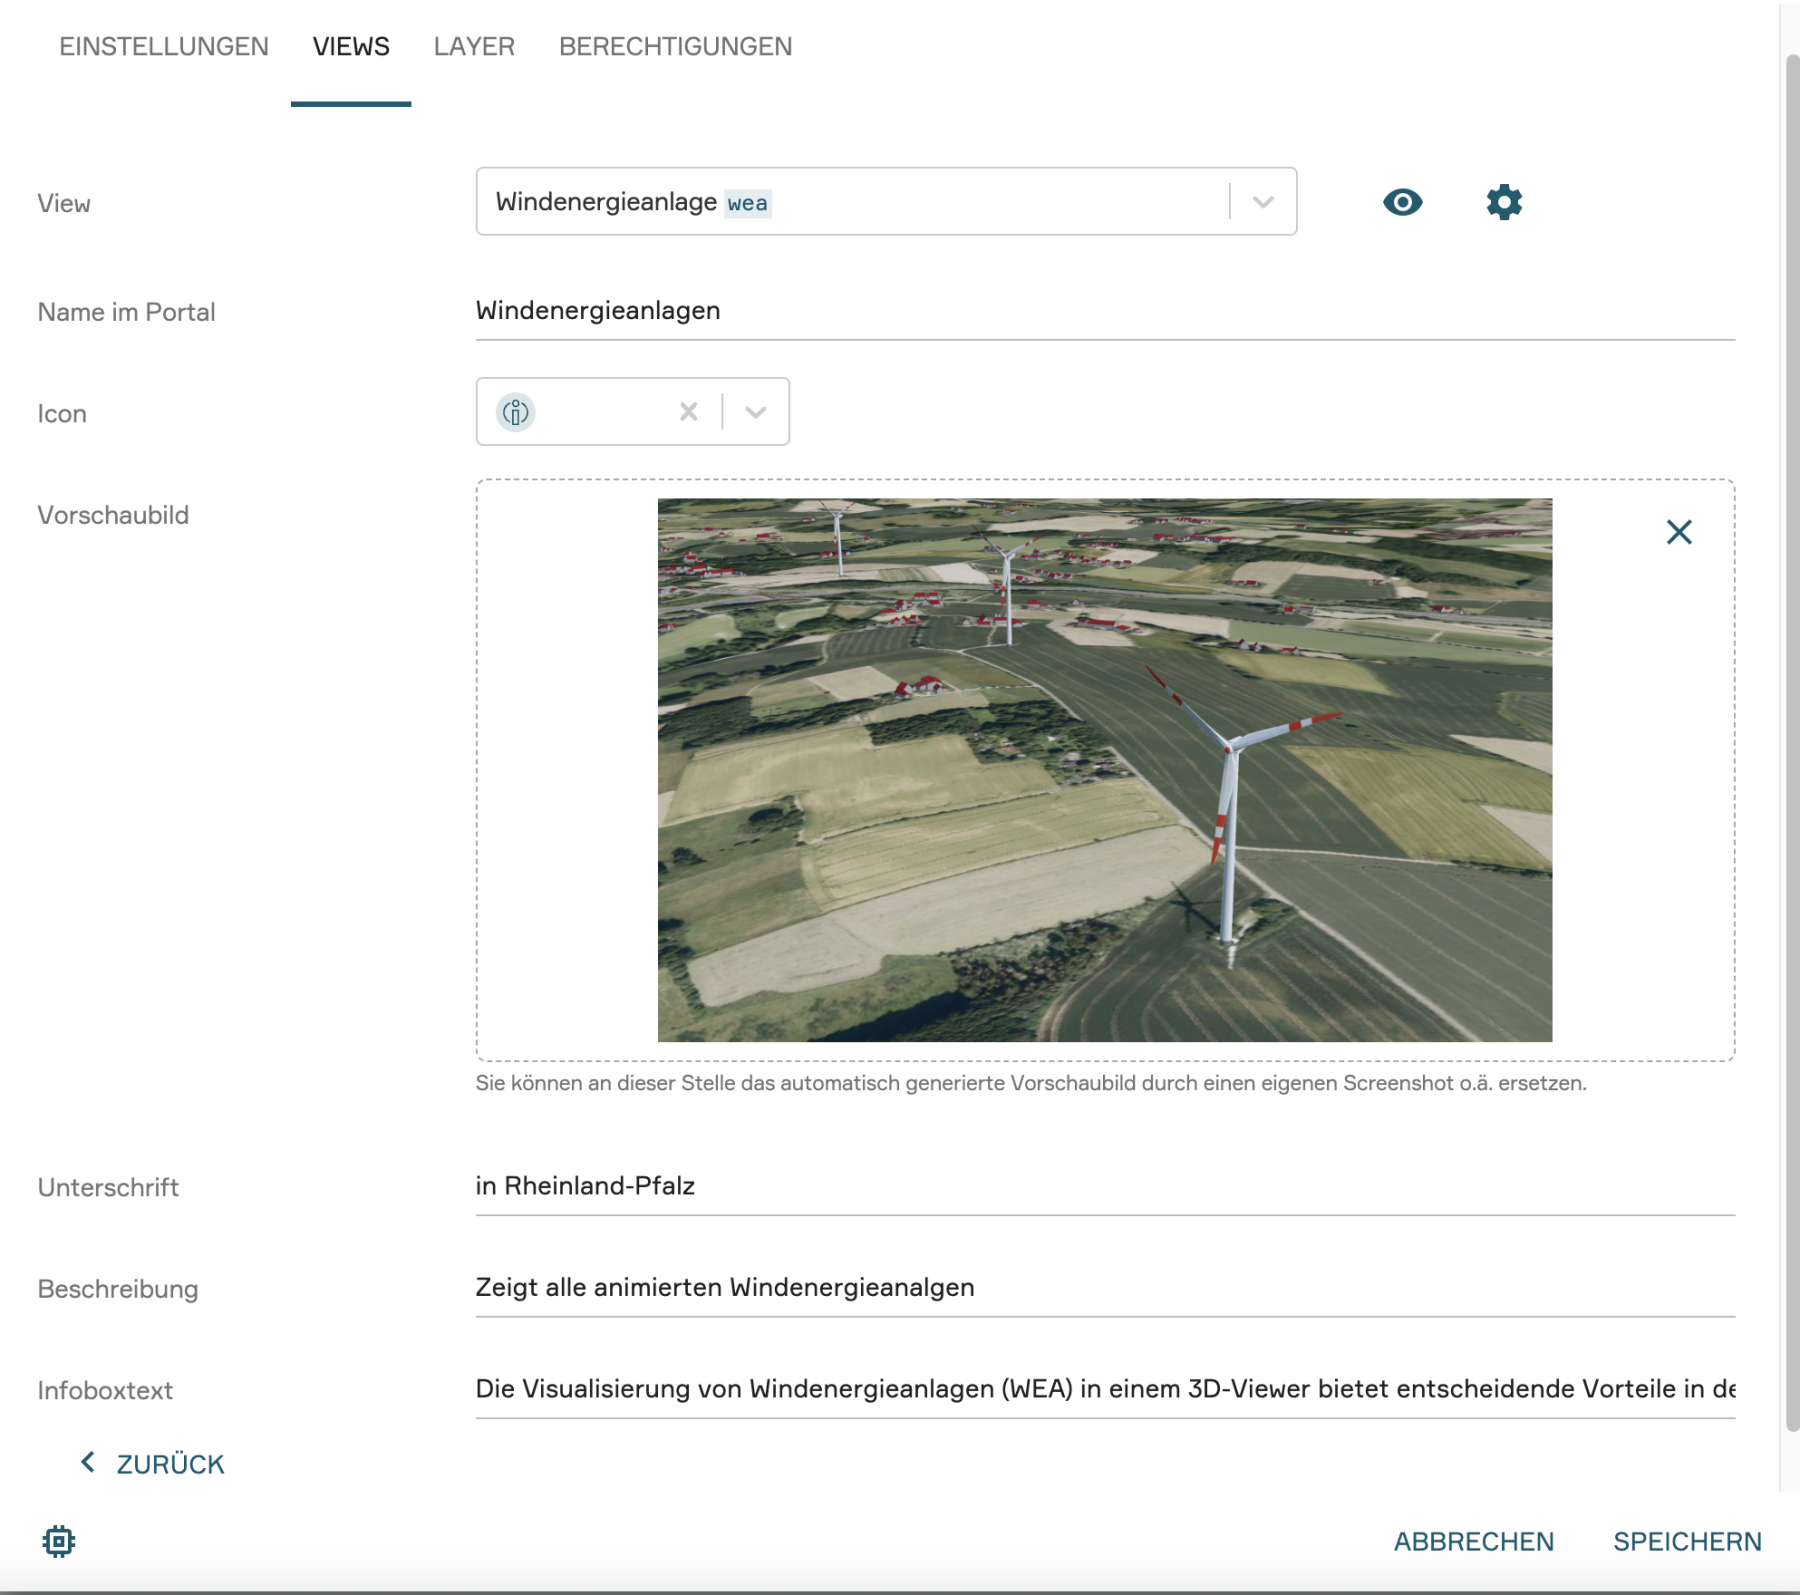
As soon as you have selected an internal view via "+ Add view", you can make the following adjustments to your view card:
Icon: Select a symbol here that fits your view.
Preview image: Upload a custom image to serve as the background of the view card in the portal.
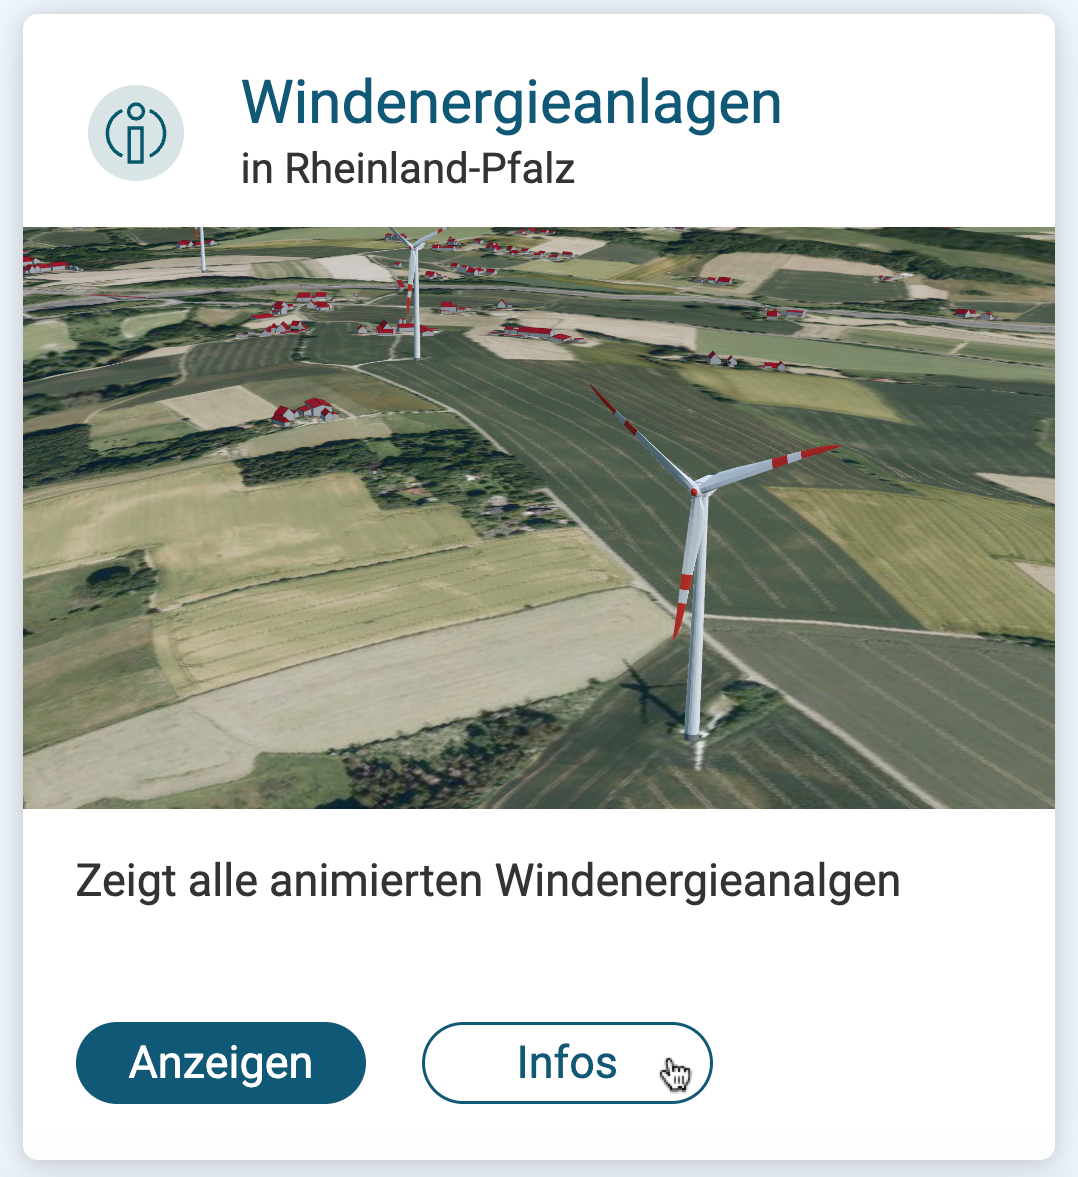
Headline: Determine which title should appear as the heading of your view card.
Description: A short text that explains the content of the view to users in more detail.
Infoboxtext: Here you can store additional information that users can access via an info button on the view card before opening the tile.
The view card designed in this way will appear under "Maps" in your portal.

Edit external View
While internal views are selected from a list of existing PlexMap views, external views allow you to integrate content from other sources or instances into your portal.
Differences in creation: In contrast to internal views, you must provide two mandatory pieces of information in the first step for external views:
- Name: The desired title for the external view.
- External URL: The complete web address (e.g., https://...) that this view card should link to.
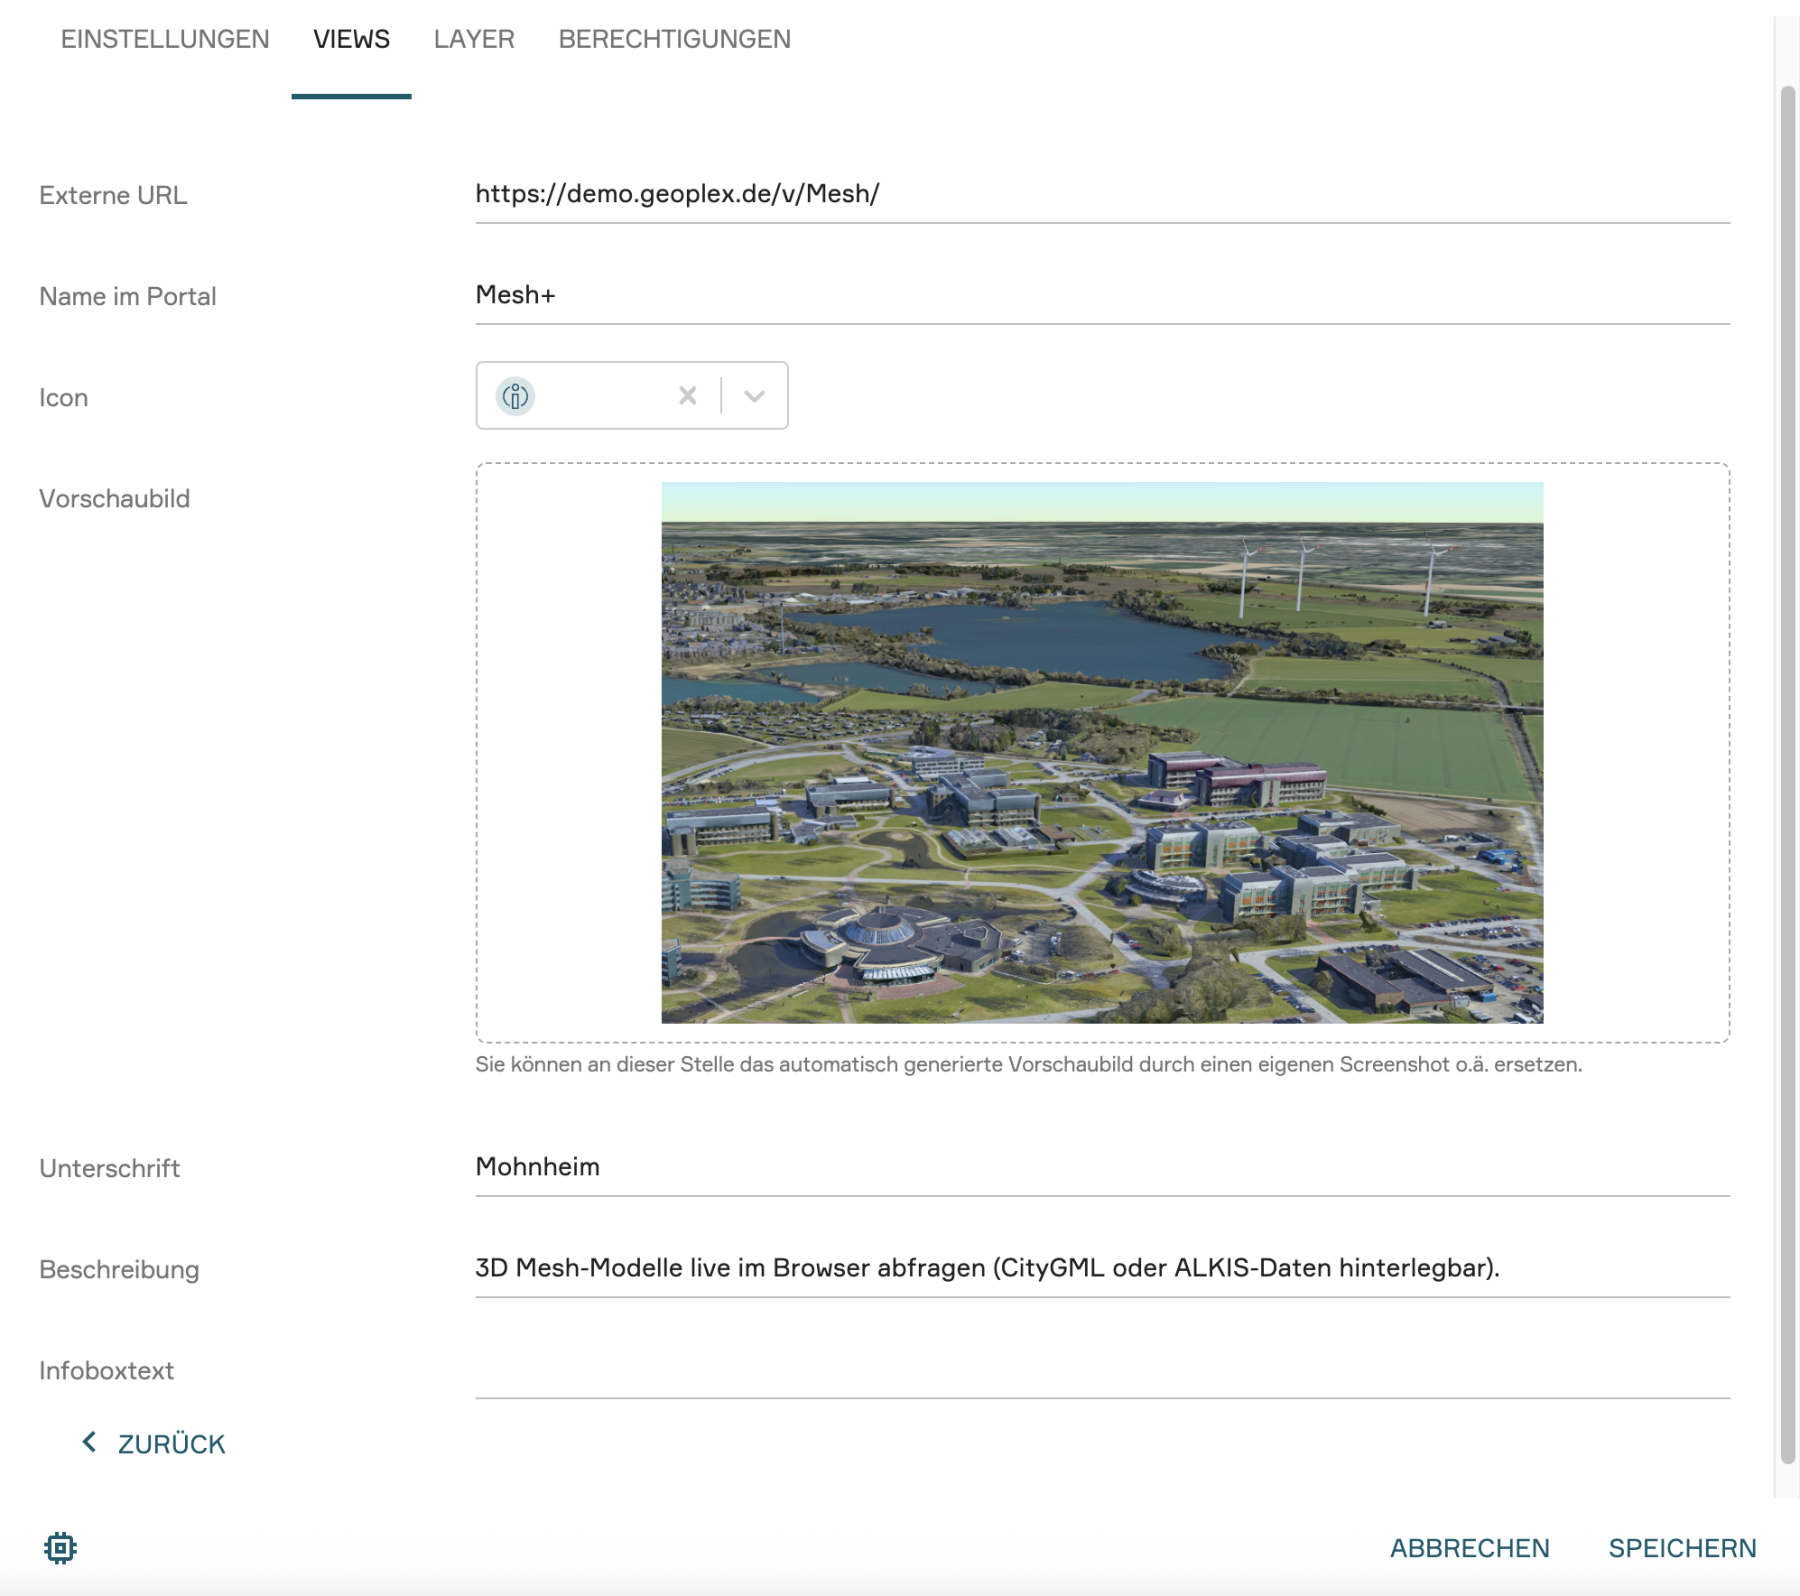
Configuration in the submenu: Once the external view has been created, the previously described submenu for the visual fine-tuning of the view card is also available here. Just like with internal views, you can individually define the external URL, the name in the portal, the icon, the preview image, the headline, the description, and the infobox text to ensure a consistent appearance for users.
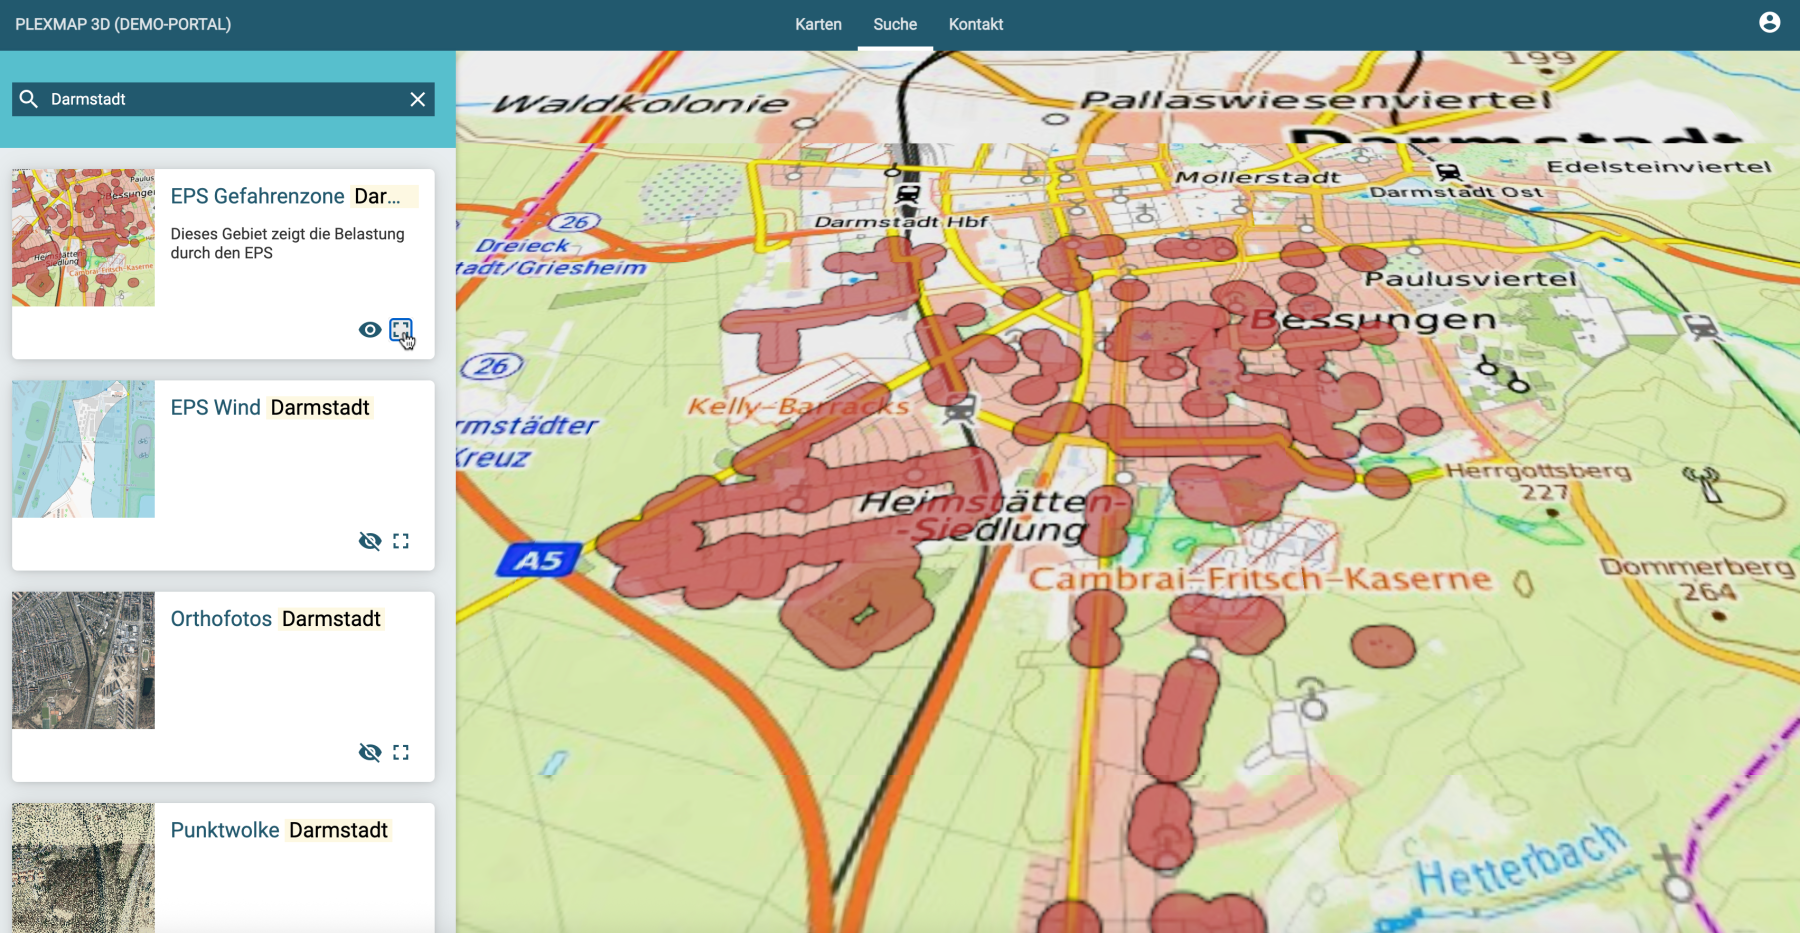
4. Layer hinzufügen Anchor
Ein wesentlicher Vorteil des PlexMap Portals ist die Flexibilität bei der Darstellung: Während Sie über den Bereich "Karten" die vorkonfigurierten View-Card (sowohl interne als auch externe) aufrufen, können Sie über den Bereich "Suche" gezielt auf instanzinterne Layer zugreifen.
Die Bereitstellung der Layer erfolgt innerhalb der Portal-Einstellungen.
Um neue Layer hinzuzufügen, wechseln Sie dort in den spezifischen Reiter Layer. Mit "+ Layer hinzufügen" wählen sie den entsprechenden Layer aus.
Ein entscheidender Schritt bei der Einbindung ist die Aktivierung der Option "Abfragbar" des jeweiligen Layers.
Erst durch diese Haken wird sichergestellt, dass die mit den Geodaten verknüpften Attribute und Sachdaten später im Portal-Frontend bei einem Klick auf die Objekte ausgelesen werden können. Zudem haben Sie hier die Möglichkeit, die Reihenfolge der Layer festzulegen, was die spätere Übersichtlichkeit im Bereich der Suche maßgeblich beeinflusst.
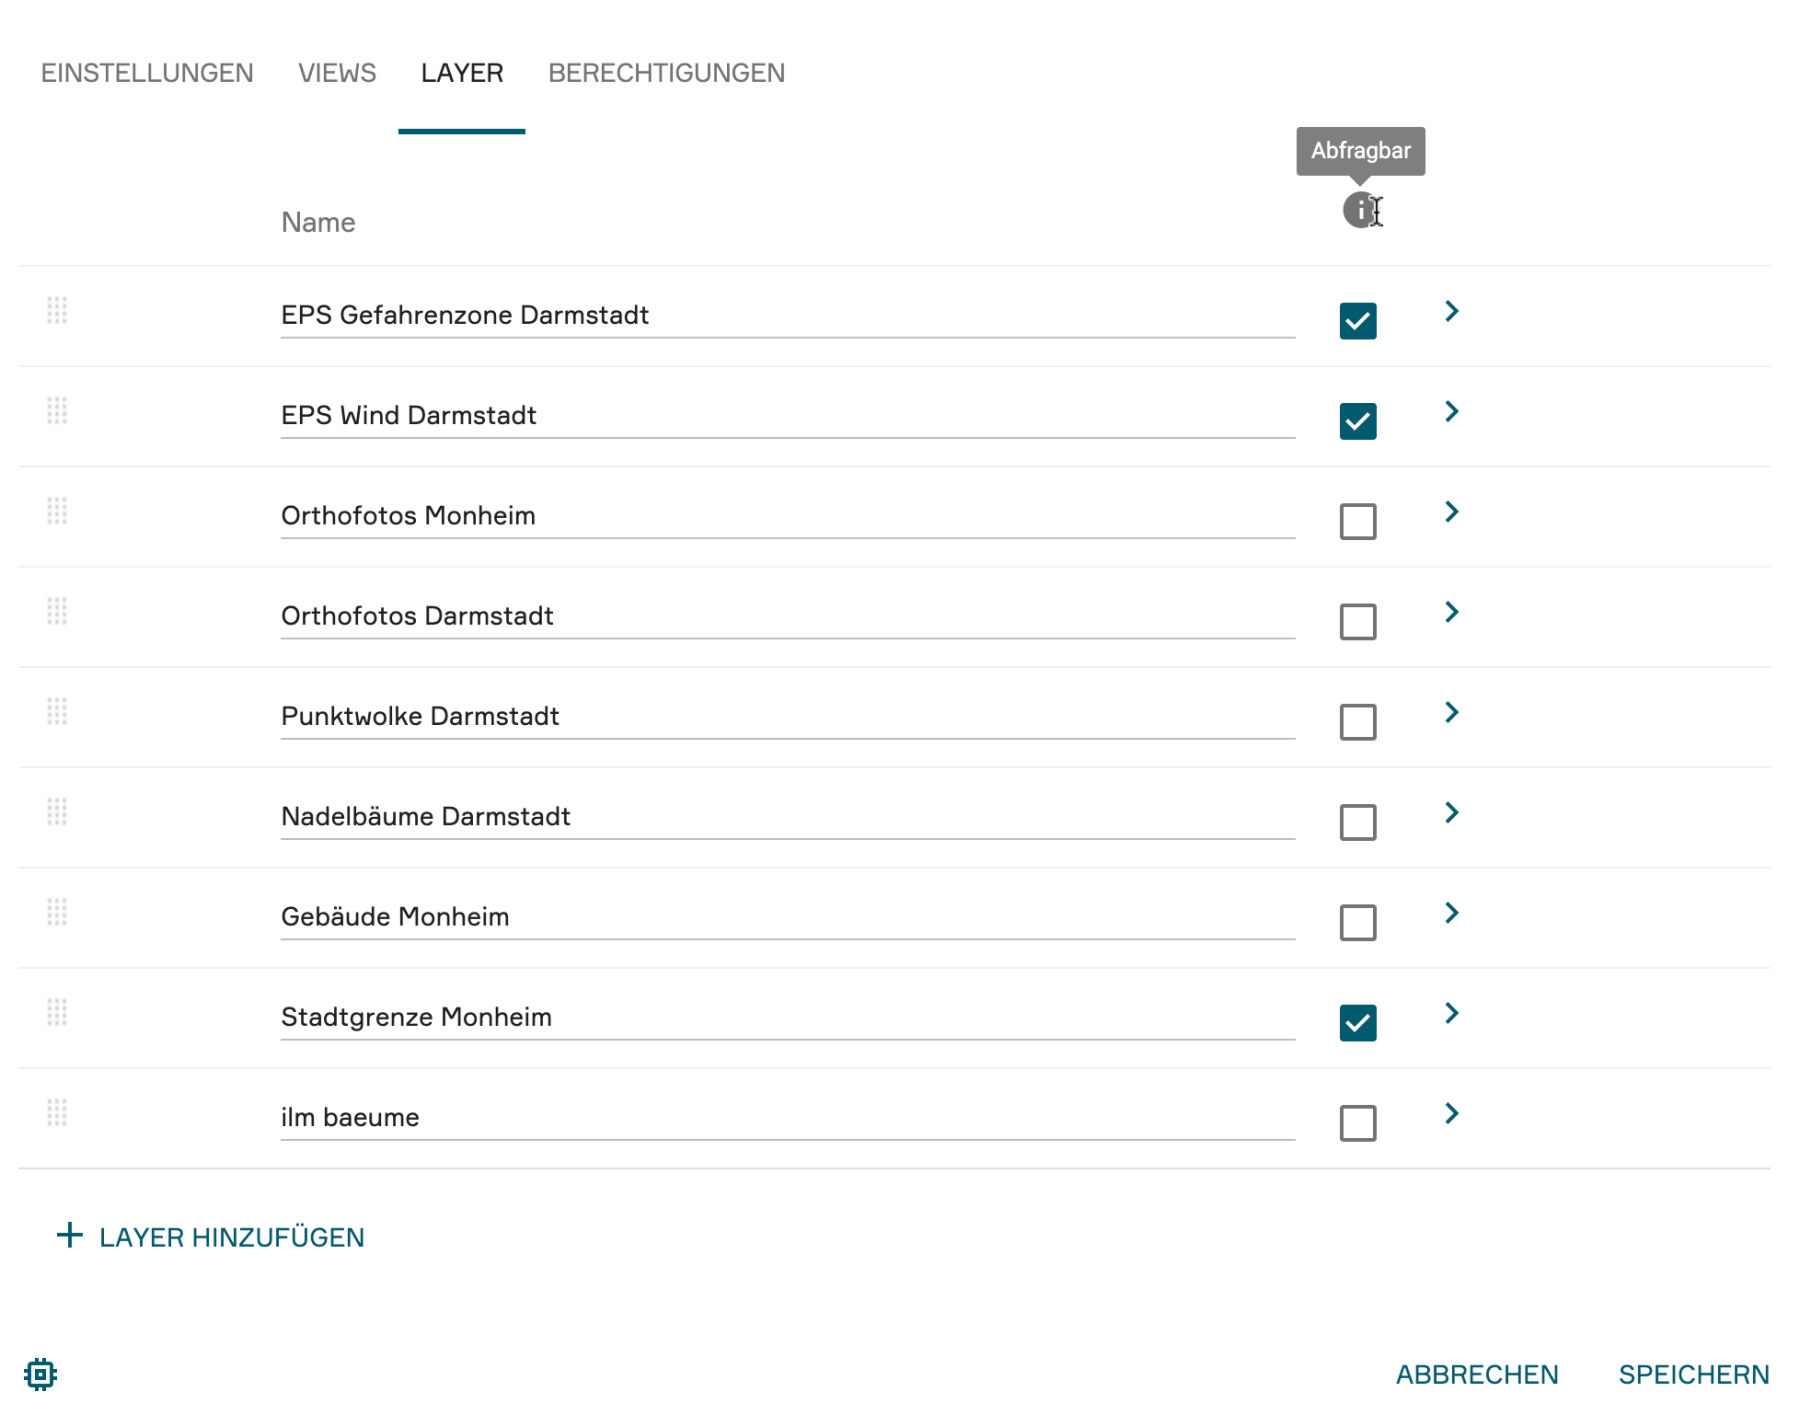
Sobald die Konfiguration abgeschlossen ist, erscheinen die Layer im Portal unter dem Schlagwort „Suche“. In der sich öffnenden Karten-Ansicht werden auf der linken Seite alle hinterlegten Layer aufgelistet.
Über das Auge-Symbol lässt sich die Sichtbarkeit des Layers aktivieren, während das Symbol der Bounding Box als praktische Navigationshilfe dient, um sofort auf die räumliche Ausdehnung der Daten zu springen.
Für eine effiziente Recherche bietet die Suchleiste oben links die Möglichkeit, die Liste gezielt nach Namen oder Kürzeln zu filtern. Sofern die Layer wie beschrieben als "Abfragbar" konfiguriert wurden, können die Nutzer die detaillierten Attributdaten direkt im View-Fenster einsehen und analysieren.
Hinweis:
Sollen die Layer öffentlich oder nur für einen bestimmten Nutzer oder eine Nutzergruppe zugänglich sein, müssen Sie die Berechtigung in den Layereinstellungen entsprechend aktivieren.
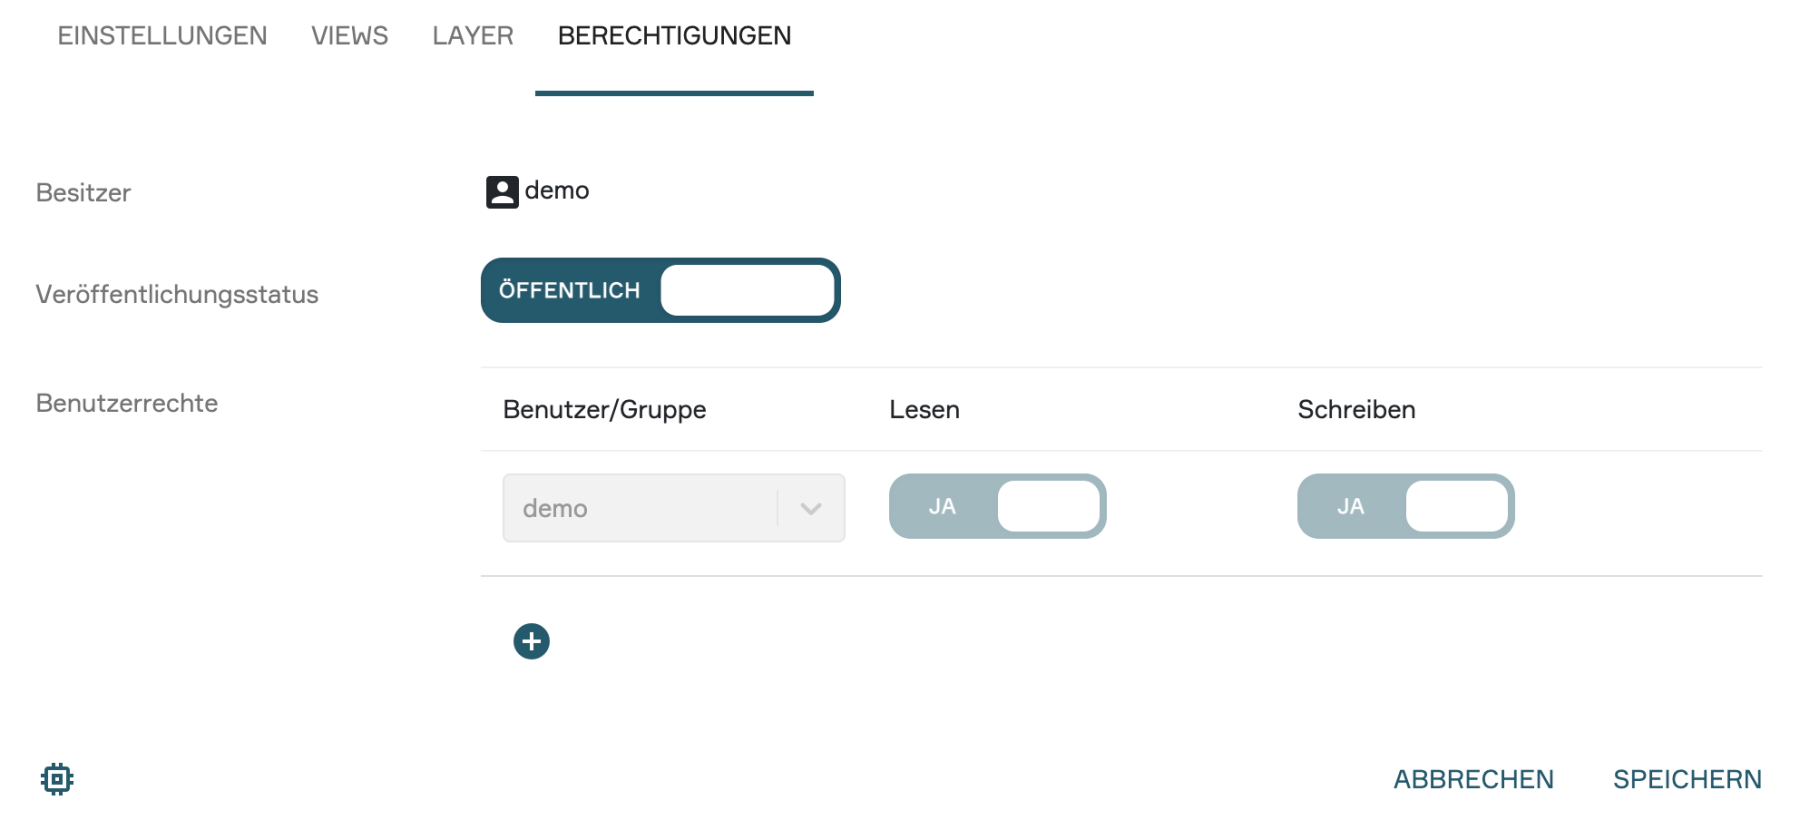
5. Permissions Anchor
The configuration of access rights for your portal is also carried out in the portal settings. The procedure follows the same logic that you are already familiar with from the View or Switchboard settings.
Publication Status:
Here you can control who can generally access the portal:
Public: The portal is freely accessible to all users via the internet.
Internal: The portal is only accessible to a restricted group of people.
User rights:
Here you can define access rights in detail at the user or group level:
Read Permissions: Configure which users or groups are allowed to view and use the portal.
Write Permissions: Here you can assign other users the right to modify portal settings, add content, or adjust the design.