Creating geoportals with PlexMap Portal
PlexMap Portal is a PlexMap component for creating geoportals. Here you can build one or more geoportals via the PlexMap backend. On the geoportal's homepage, the map applications created with PlexMap are clearly presented and are thus easily accessible to all users. Additionally, it is possible to integrate map applications from external providers. You will learn how to build geoportals with PlexMap in this tutorial.
To be able to implement this tutorial, you need access to the PlexMap Portal component as well as at least one of the specialized applications PlexMap 2D, PlexMap 3D, or PlexMap Oblique.
Create a new portal Anchor
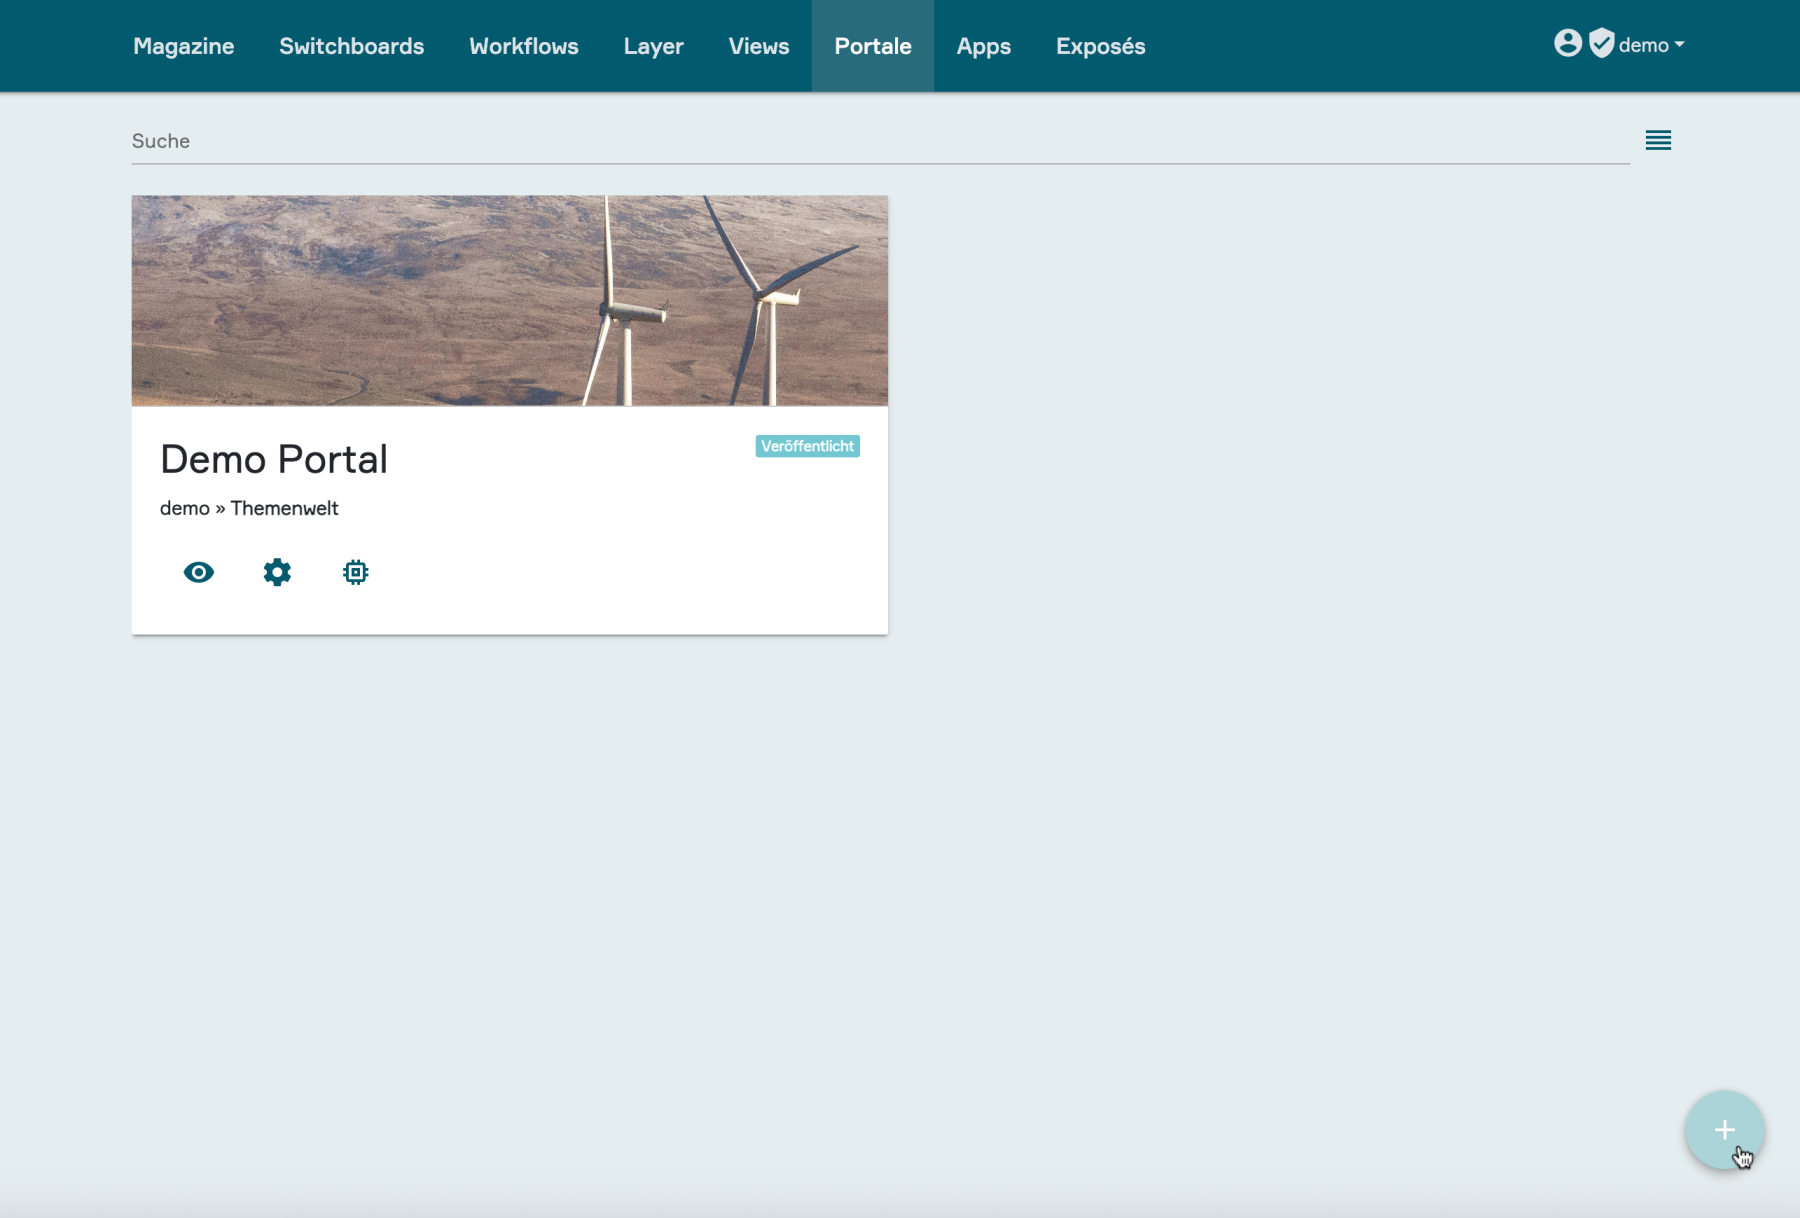
First, navigate to the "Portals" main menu in the PlexMap backend and then click on the plus button at the bottom right to create a new portal.
A pop-up window opens with the submenus "Settings", "Views", "Layers", and "Permissions".
Configuration of portal settings Anchor
The following chapters describe in detail how you can fill the newly created portal with content and customize the design of your portal. The demo portal shown here serves as a reference for the following explanations.
1. Settings
Name:
Designation of the portal. The name entered here appears as the title at the top left of the finished portal.
Shortname:
The name entered here will become part of your portal URL.
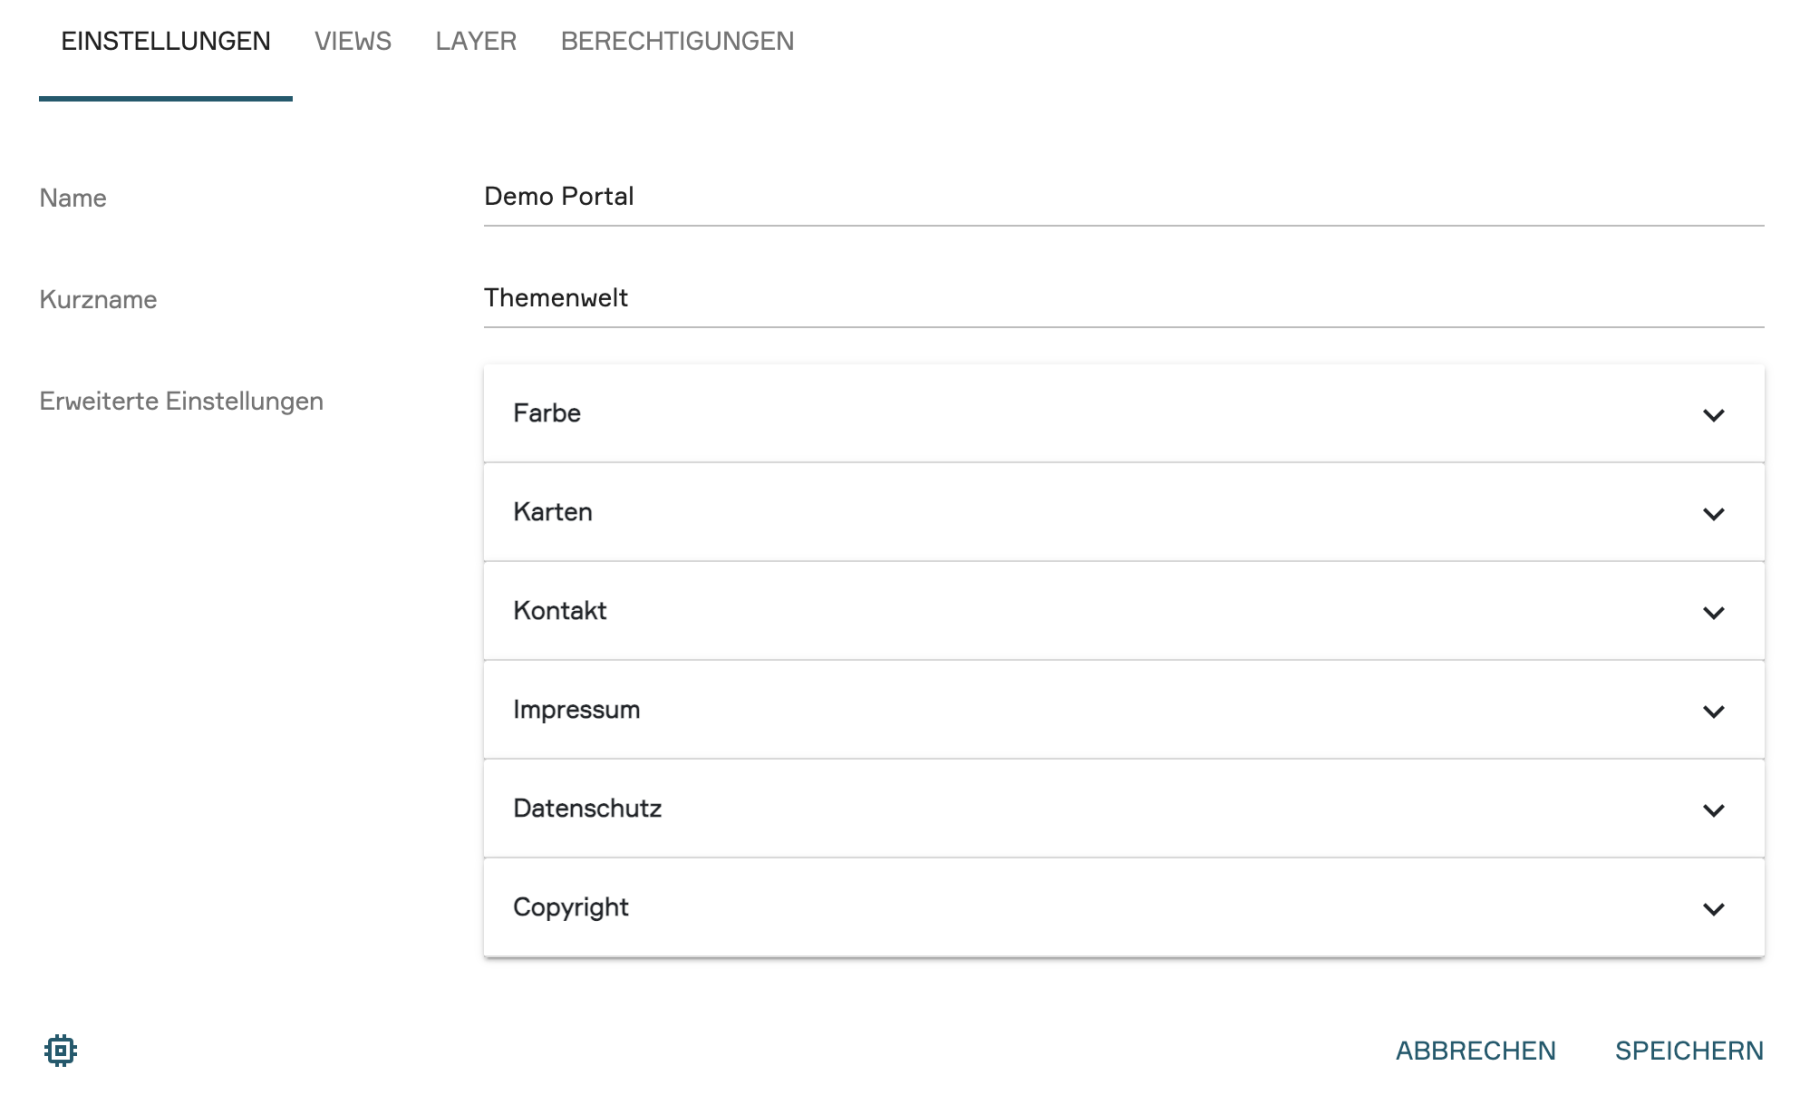
2. Advanced Settings
In the advanced settings, you can give the portal the desired appearance and add legal information as well as contact details. The advanced settings are divided into the following six sub-items:
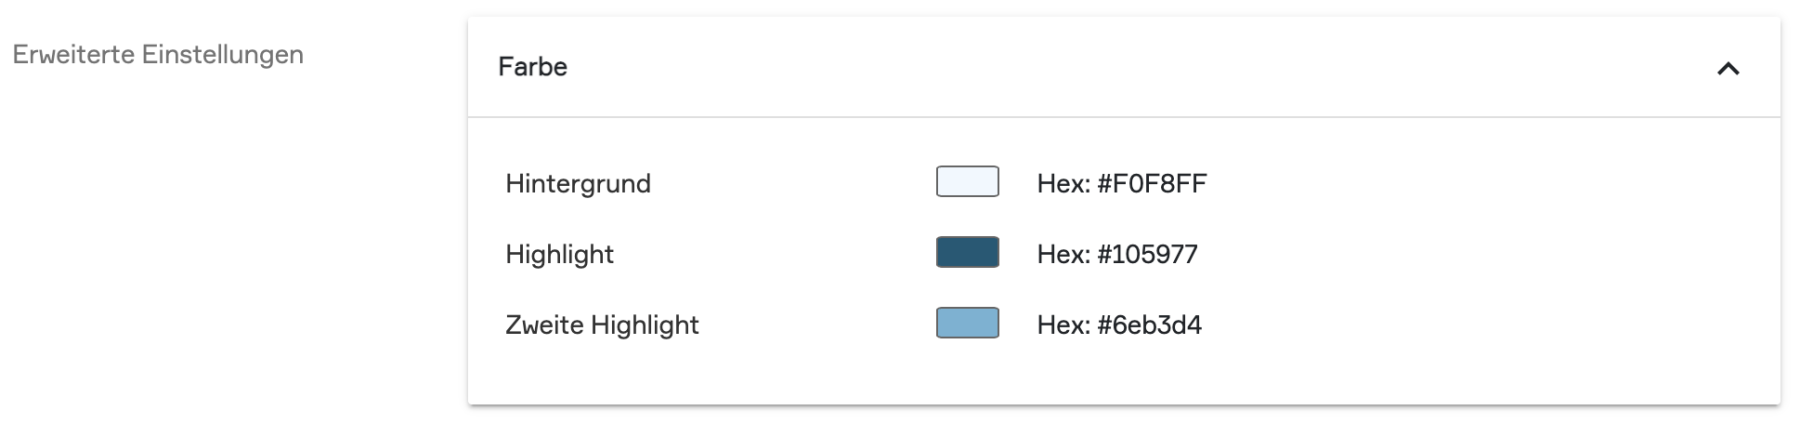
Color:
The portal's color scheme is defined here:
Background: Defines the background color of the portal layout.
Highlight color: Defines the background color of the main menu, the font color, the background color of the buttons, and other design elements in the portal.
Second highlight color: Defines the background color in the area of the layer search in the portal chapter "Search".
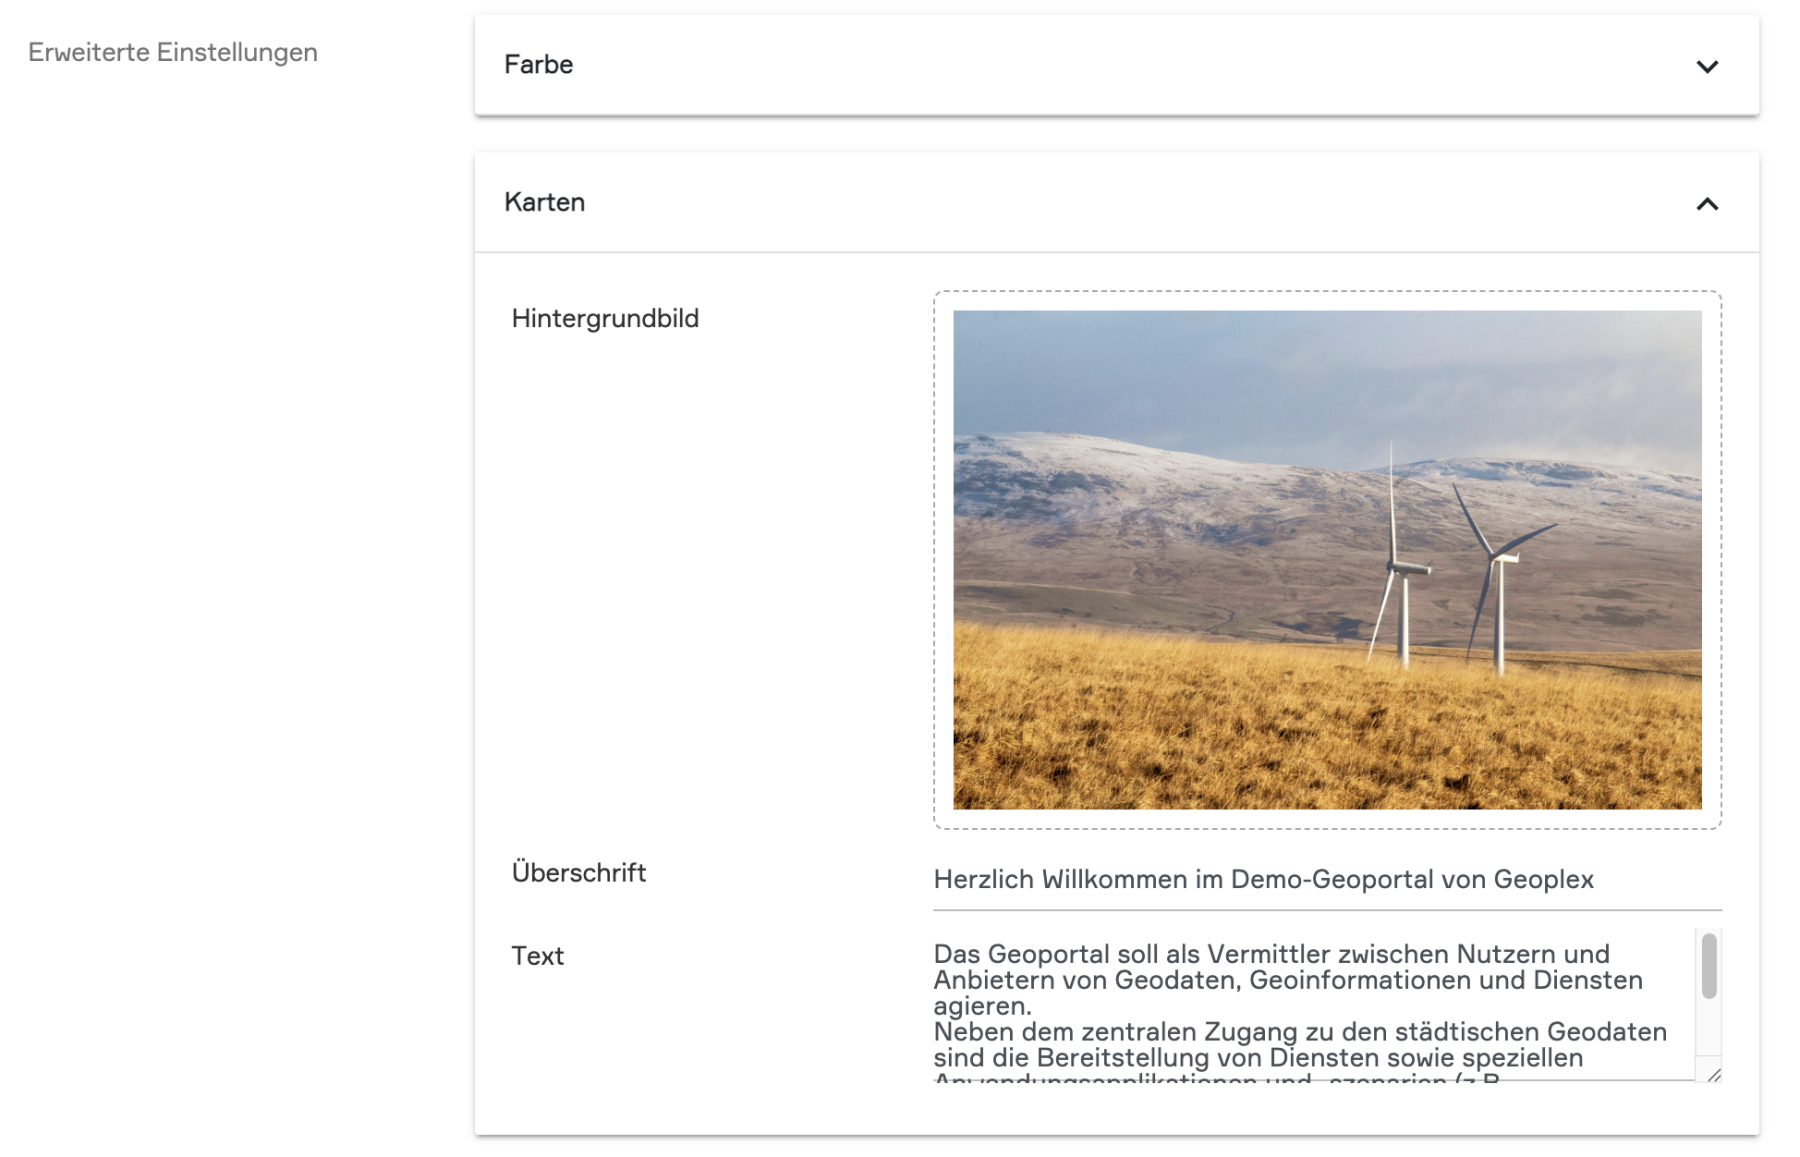
Maps:
In this section, you can customize the design of the portal:
- Background image: The image set here appears prominently in the background at the top of the portal chapter "Maps".
- Headline: Here you can set a title for your portal that appears over the background image.
- Text: An accompanying information text that appears below the title on the background image.
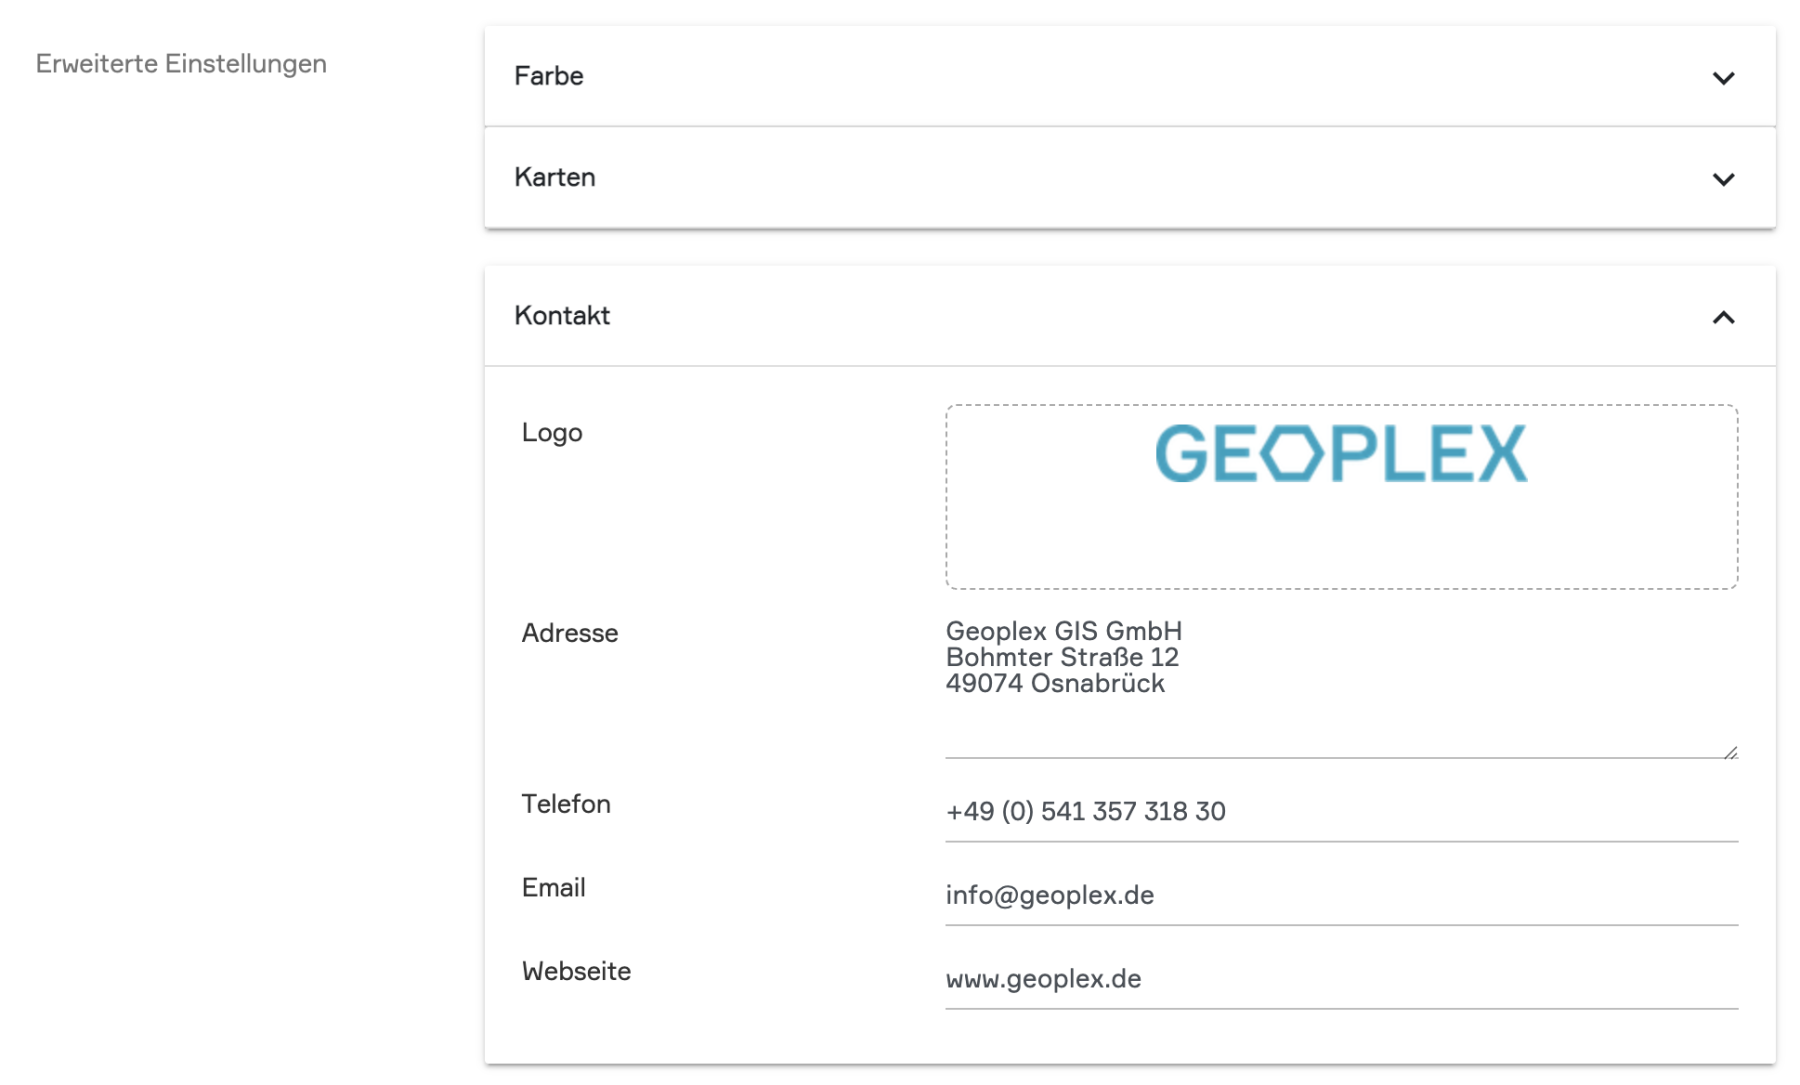
Contacts:
Central contact information for your portal can be stored here. The contact information is accessed via the portal chapter "Contact".
- Logo: Hier können Sie Ihr Firmenlogo oder ein Projektlogo hinterlegen.
- Address, Phone Number & Email Address: You can store the corresponding contact details here.
- Webseite: Enter the link to your homepage here.
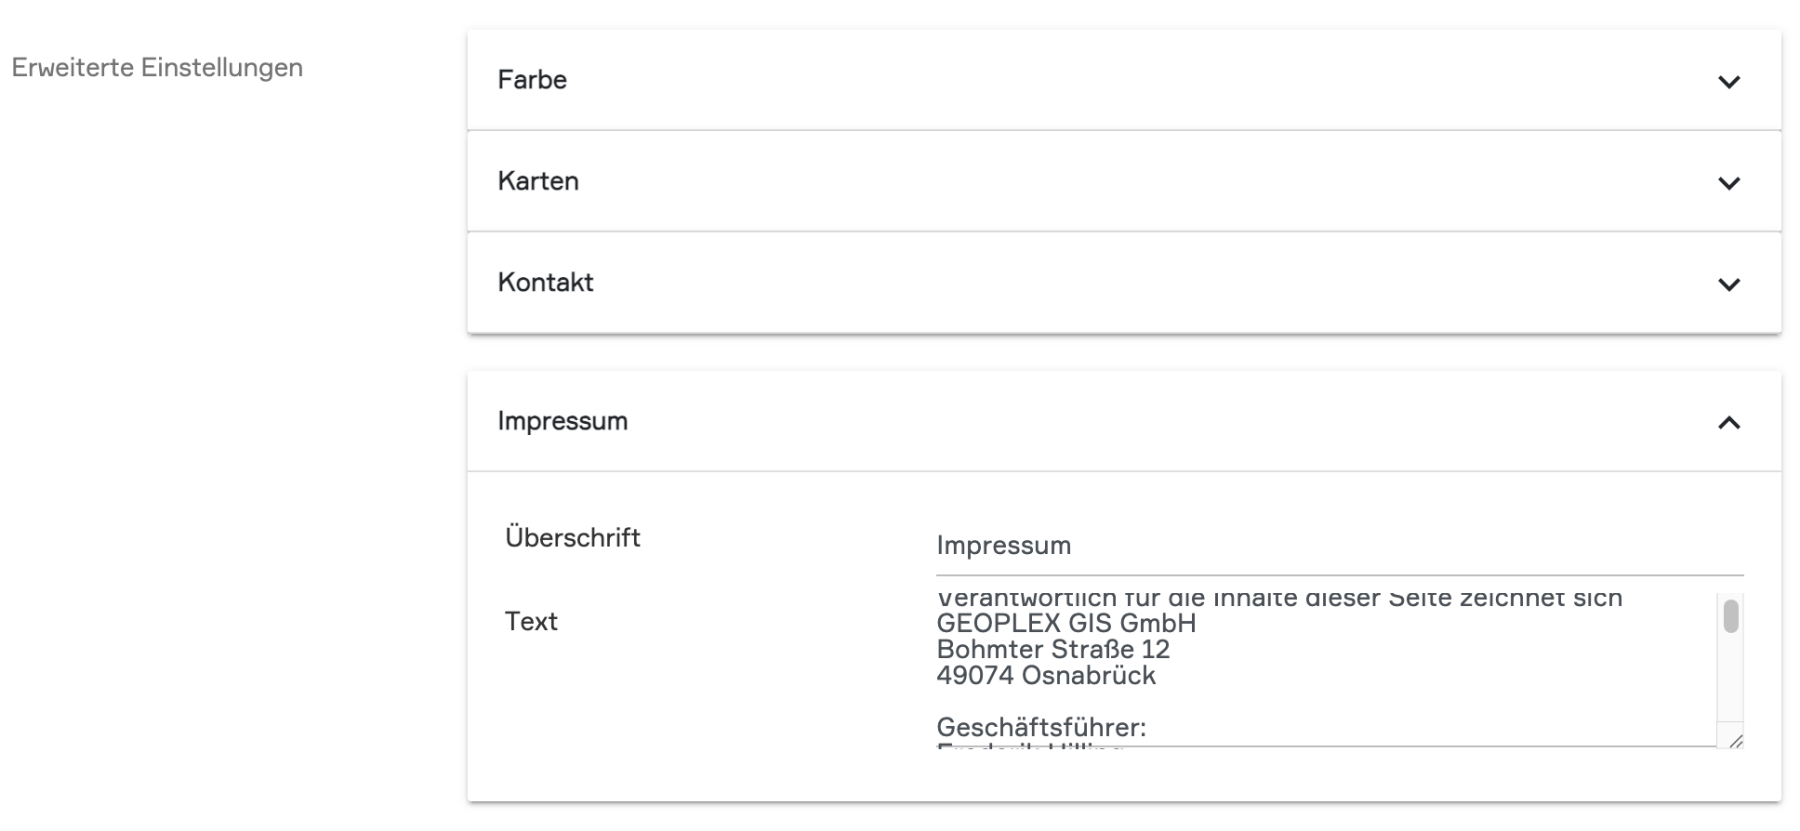
Imprint:
You can insert the texts for your legal notice here. The legal notice is accessed in the footer of the portal in the center via the "Imprint" button.
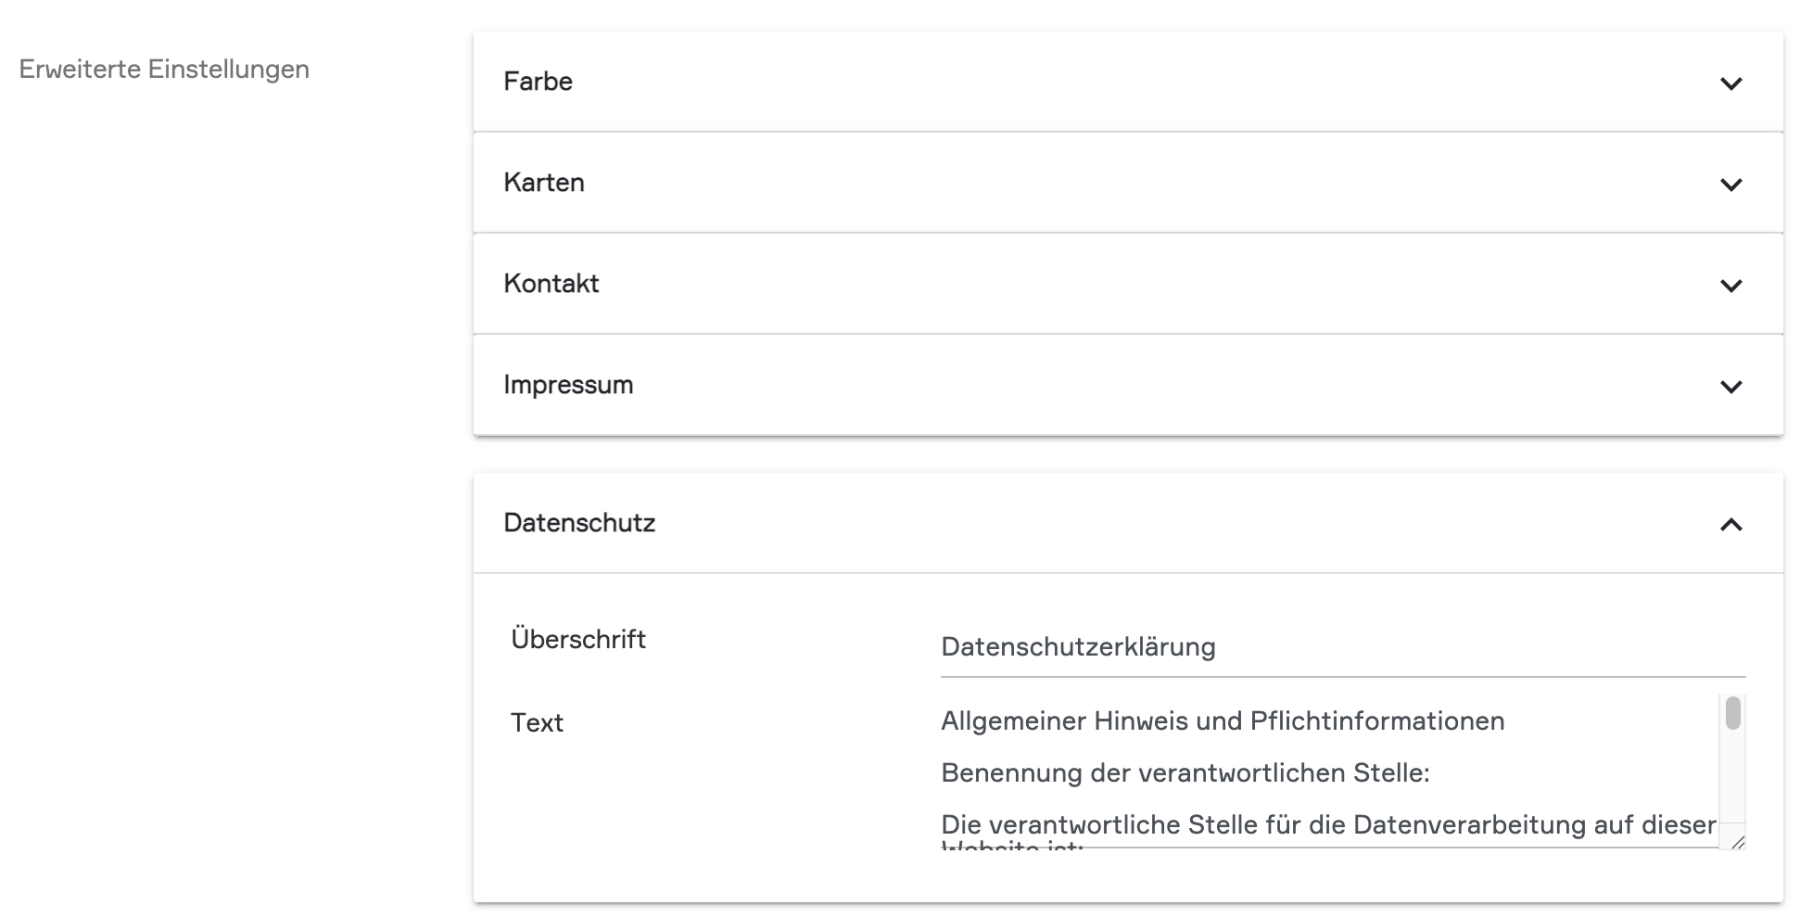
Privacy Policy:
You can insert the texts for data protection information here. The "Privacy Policy" page is accessed in the footer of the portal via the corresponding button.
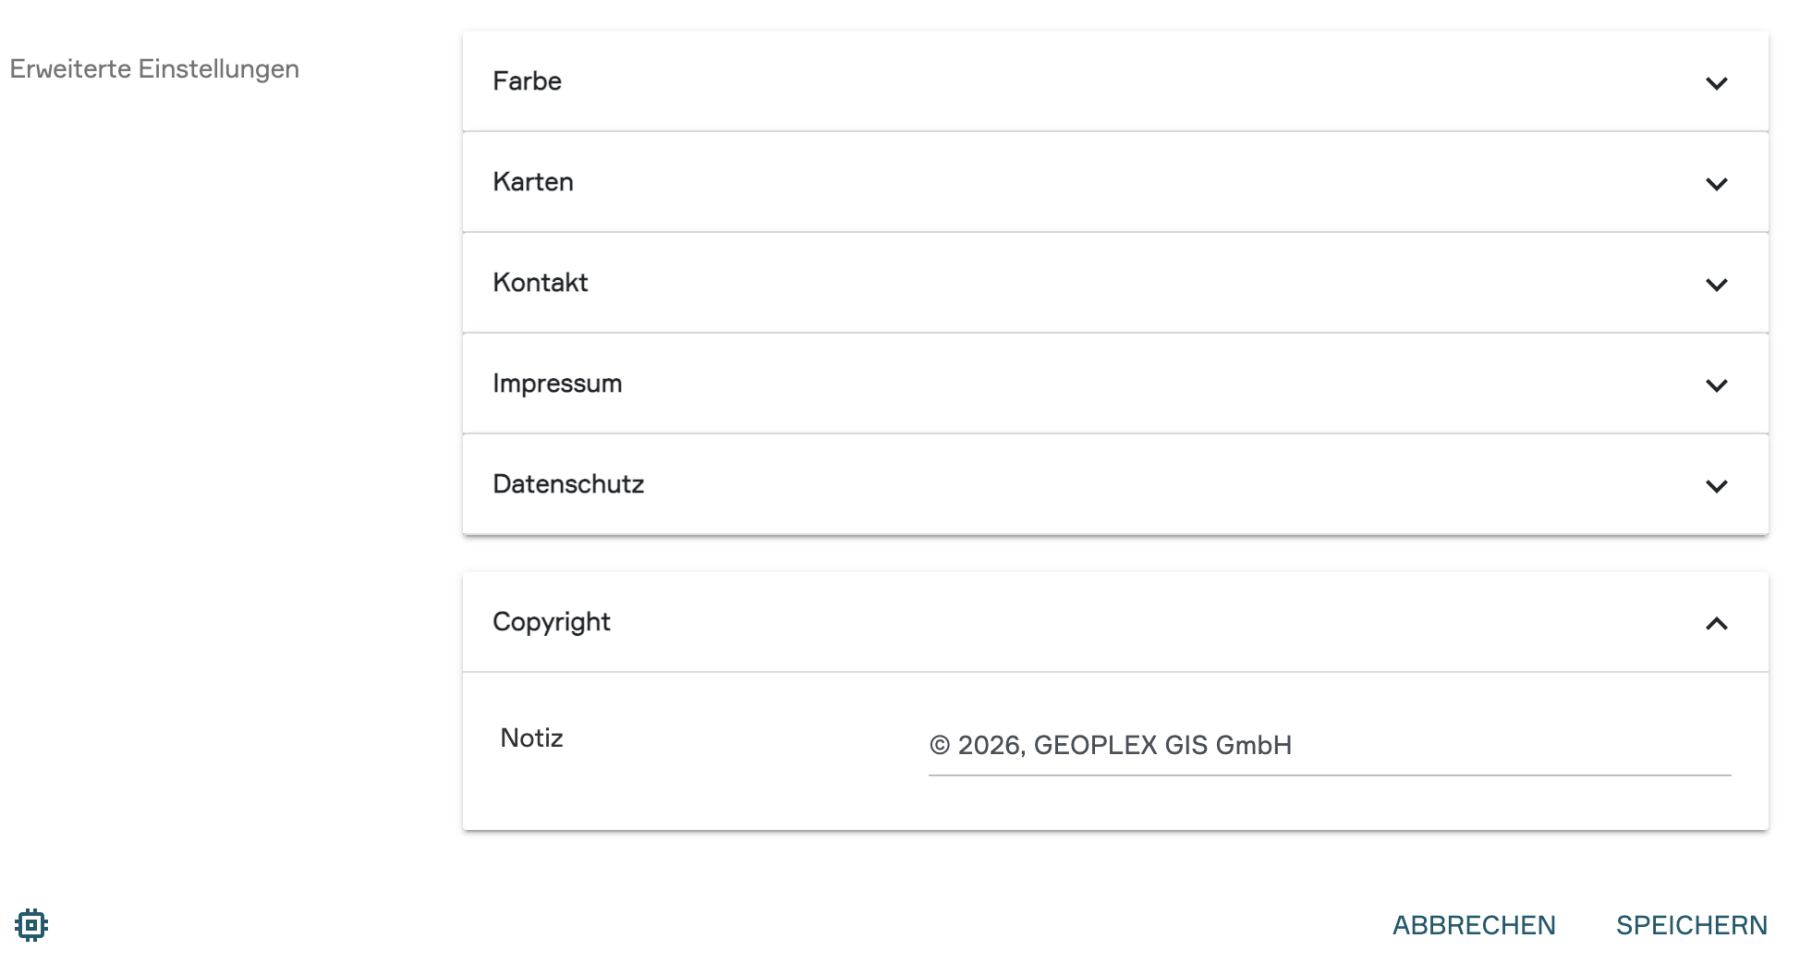
Copyright :
A copyright notice, for example regarding the geodata used in the portal, can be set here (e.g., © Data Publisher).
3. Adding internal and external Views Anchor
Now that the basic framework of the portal is in place, you can fill it with content in the "Views" sub-chapter. In this context, PlexMap distinguishes between:
Internal views (views created directly within your instance)
External views (links to external map applications or other websites)
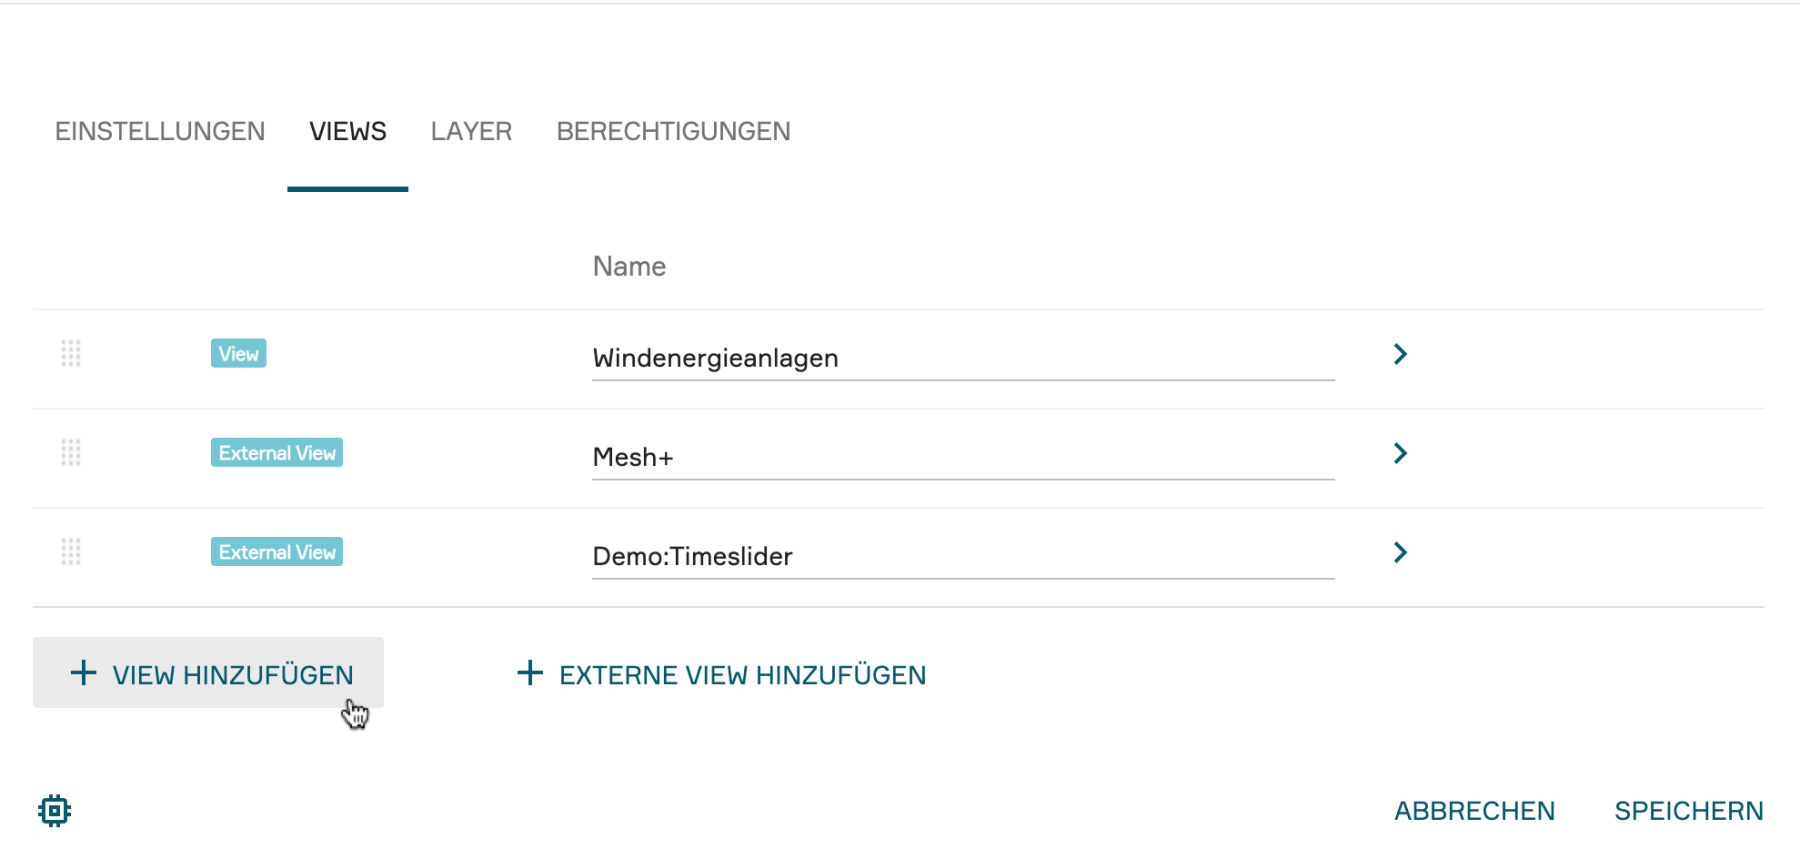
Accordingly, under the "Views" tab, you will find two buttons: "Add View" for adding an internal view and "Add External View" for adding an external map application or website.
Adding internal View
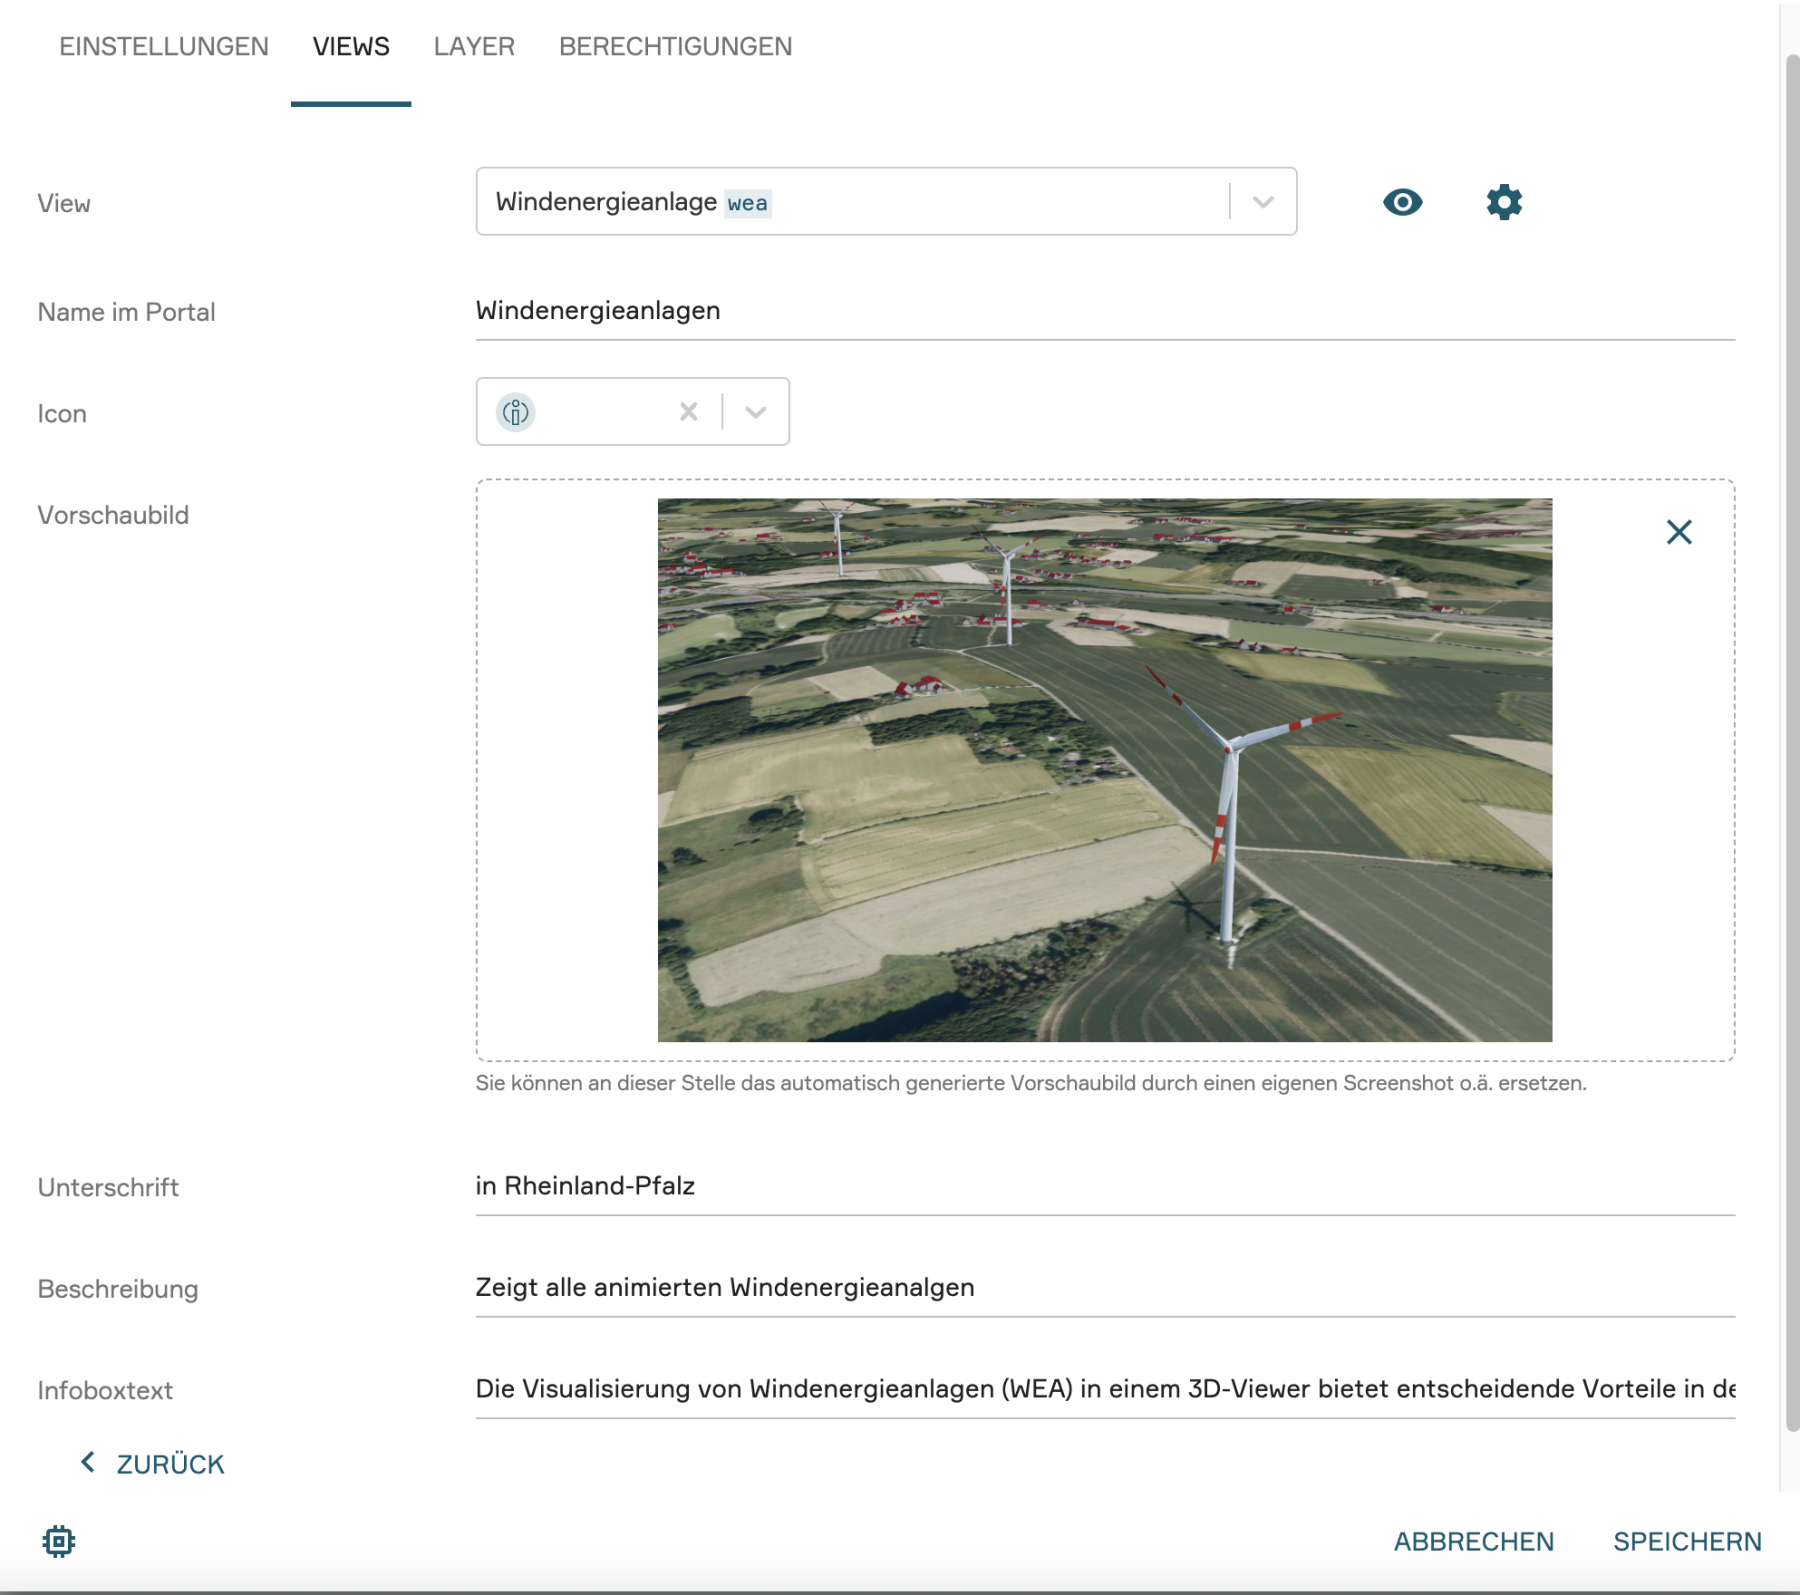
Once you have selected an internal view via "+ Add View", you can make the following adjustments to your view card:
- Icon: Select a symbol here that matches your view.
- Preview Image: Upload a custom image to serve as the background for the view card in the portal.
- Headline: Determine which title should appear as the headline of your view card.
- Description: A short text that explains the content of the view to users in more detail.
- Infobox text: Here you can store additional information that users can access via an info button on the view card before opening the tile.
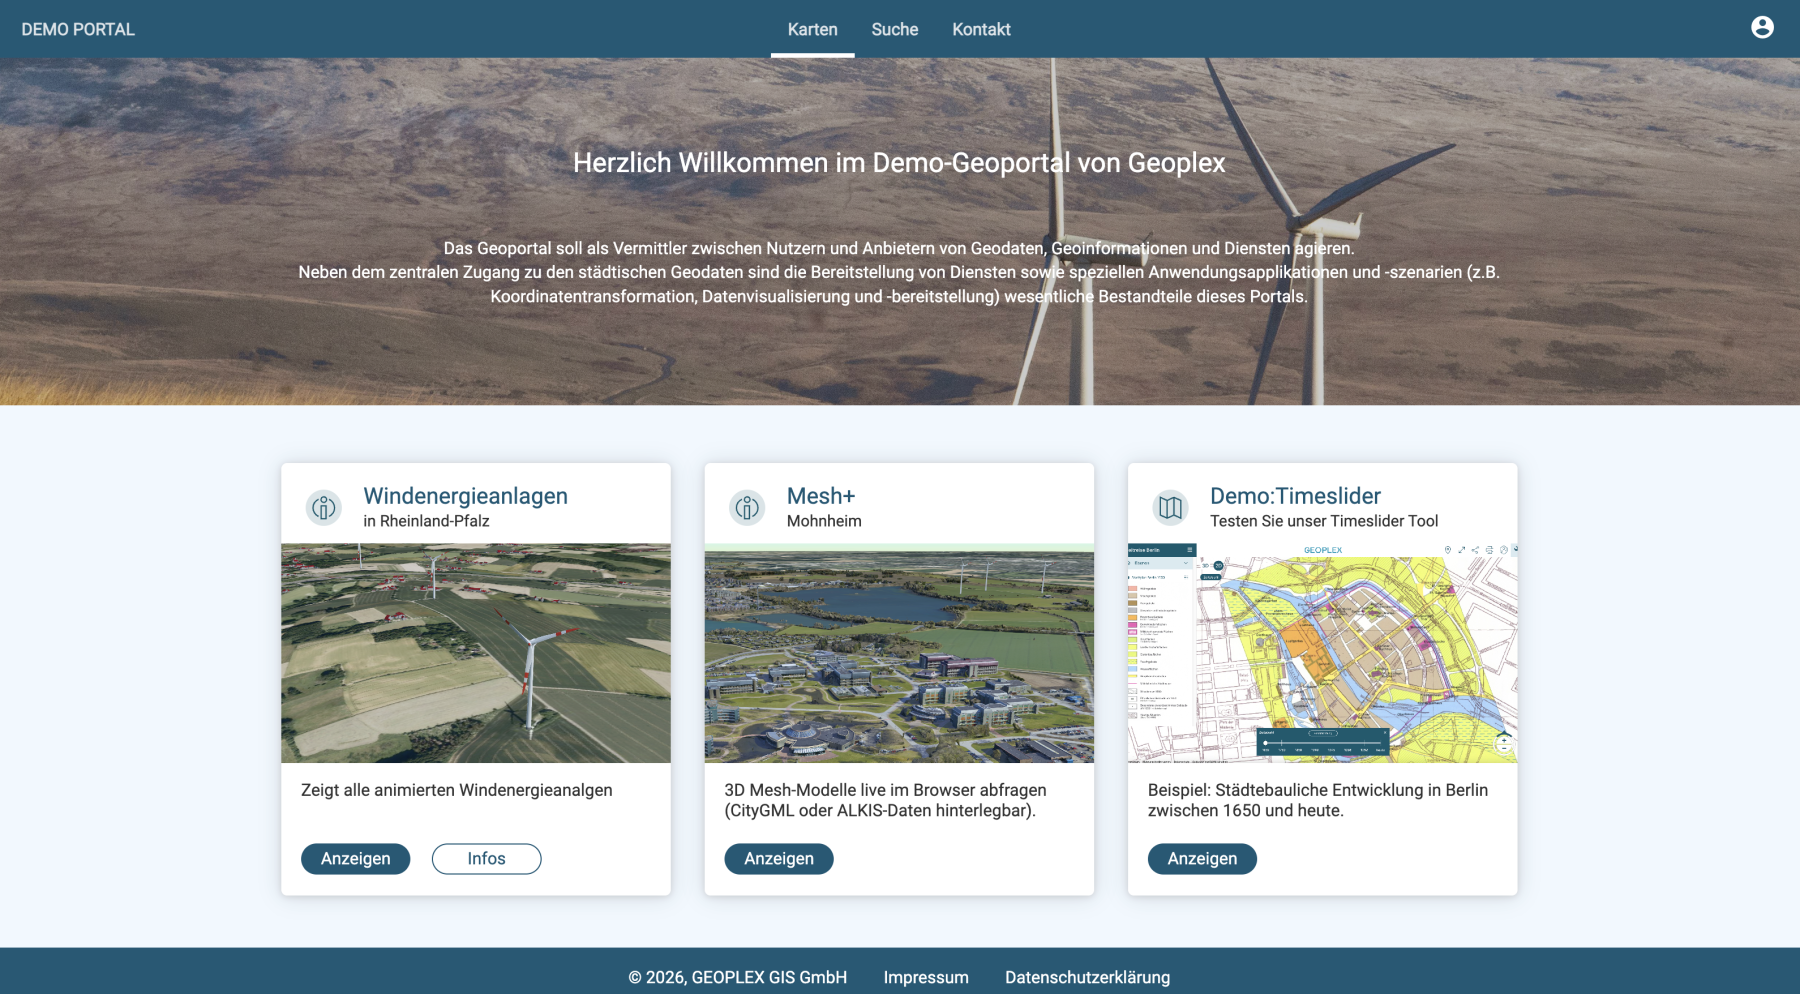
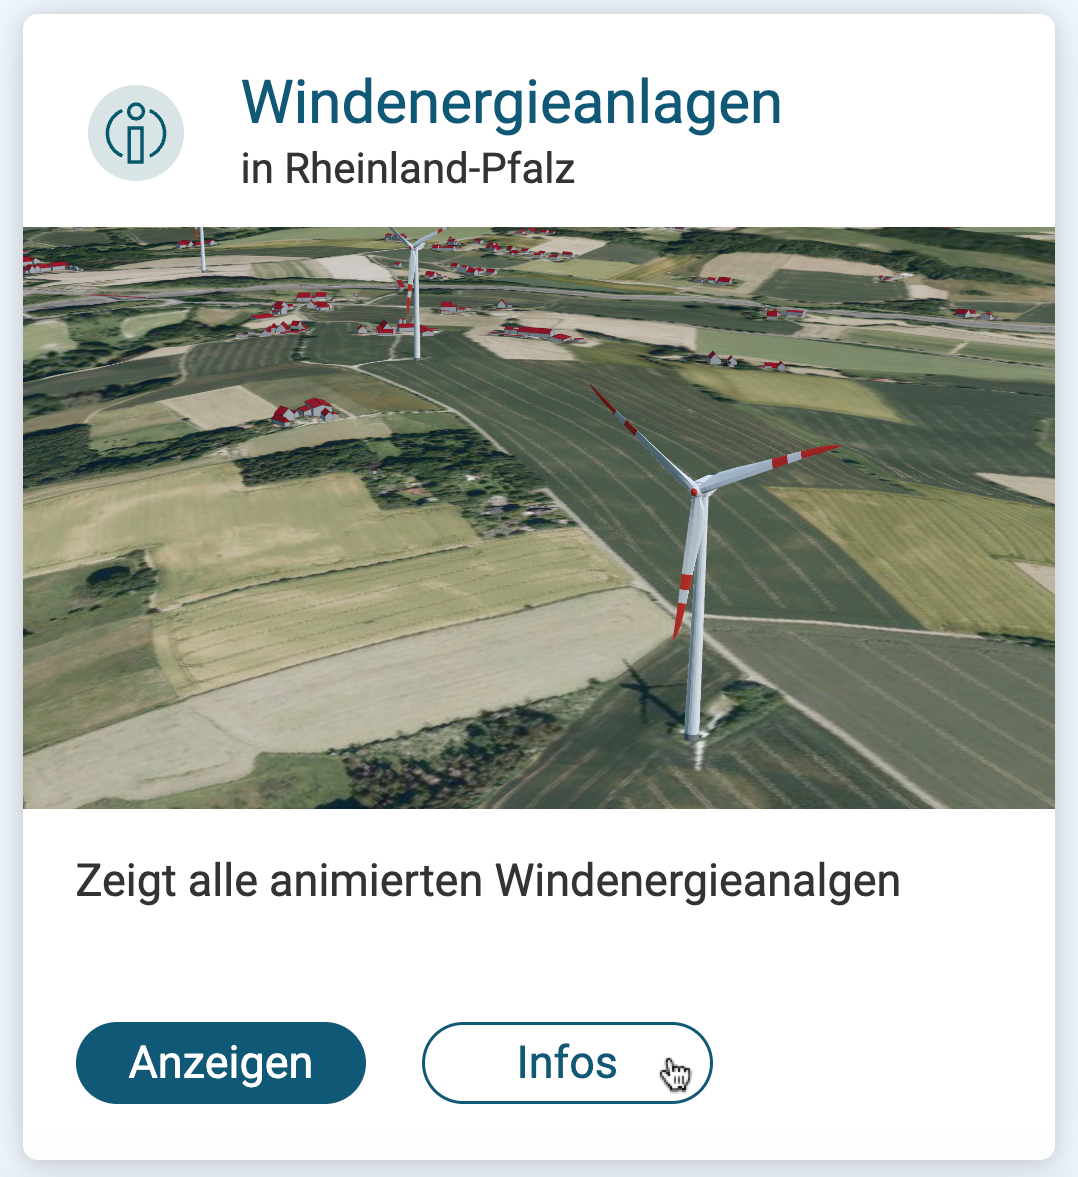
The view card (Tile) designed in this way appears under "Maps" in your portal.
Note: An example of how a view card is displayed in PlexMap Portal is the "Wind Turbines" view card shown here.

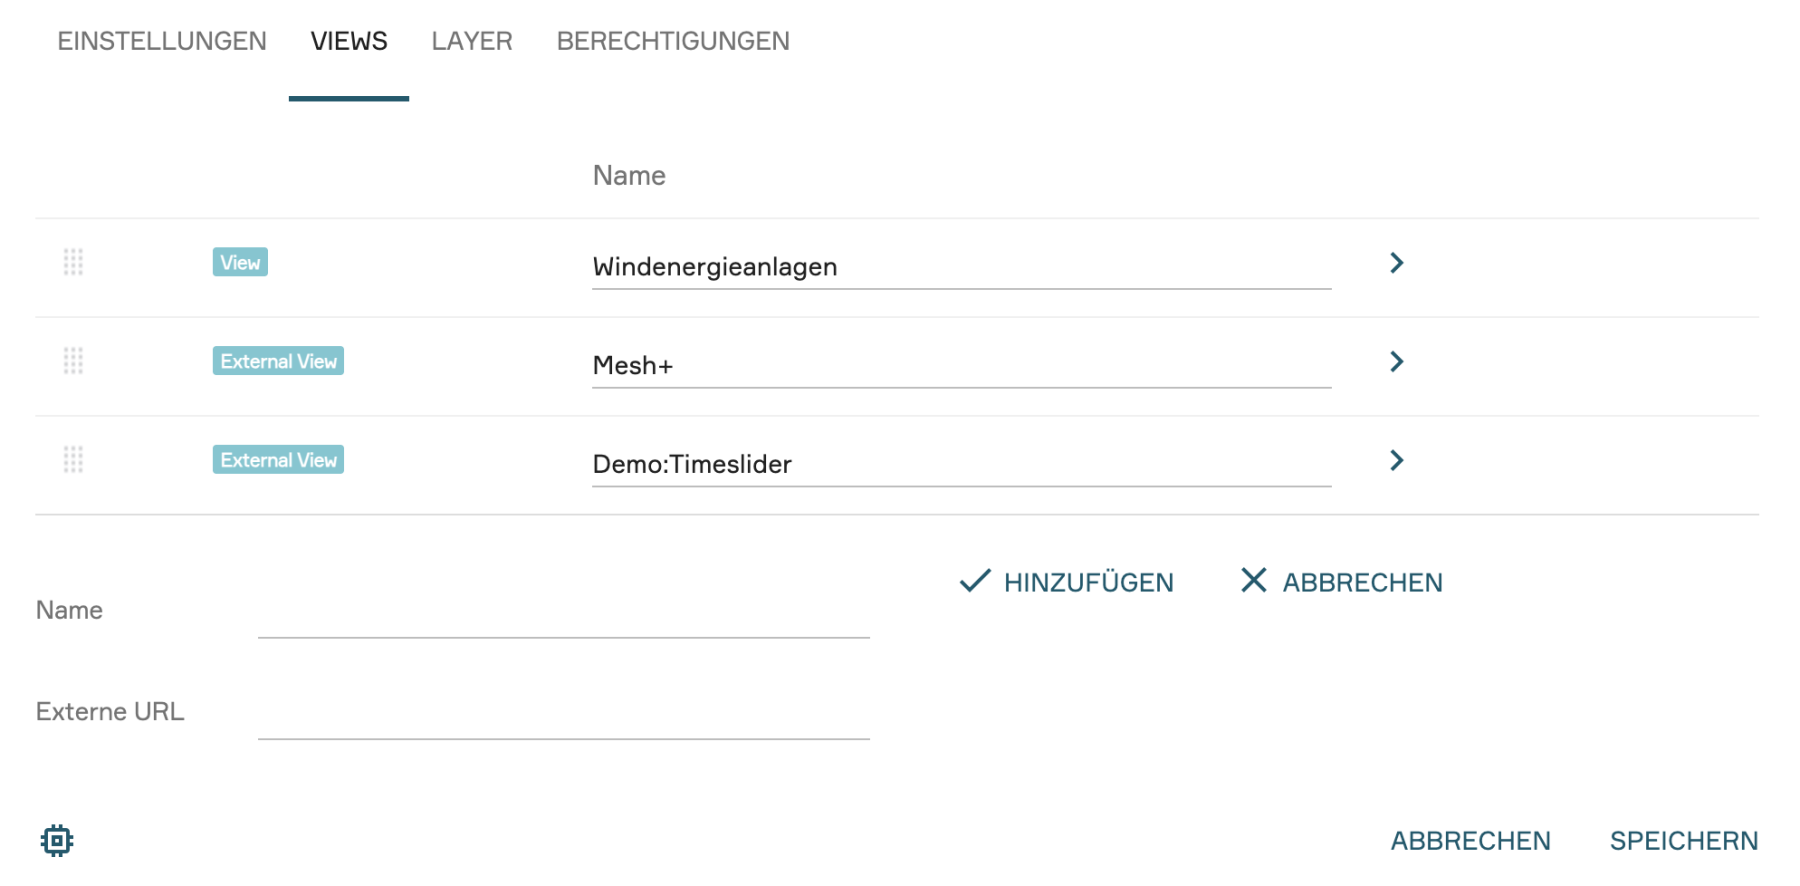
Adding external View
While internal views are selected from a list of existing PlexMap views, you use external Views to integrate content from other sources or instances into your portal.
Differences when creating: In contrast to internal Views, you must provide two mandatory pieces of information for external Views in the very first step:
- Name: The desired title for the external view.
- External URL: The full web address that this view card should link to.
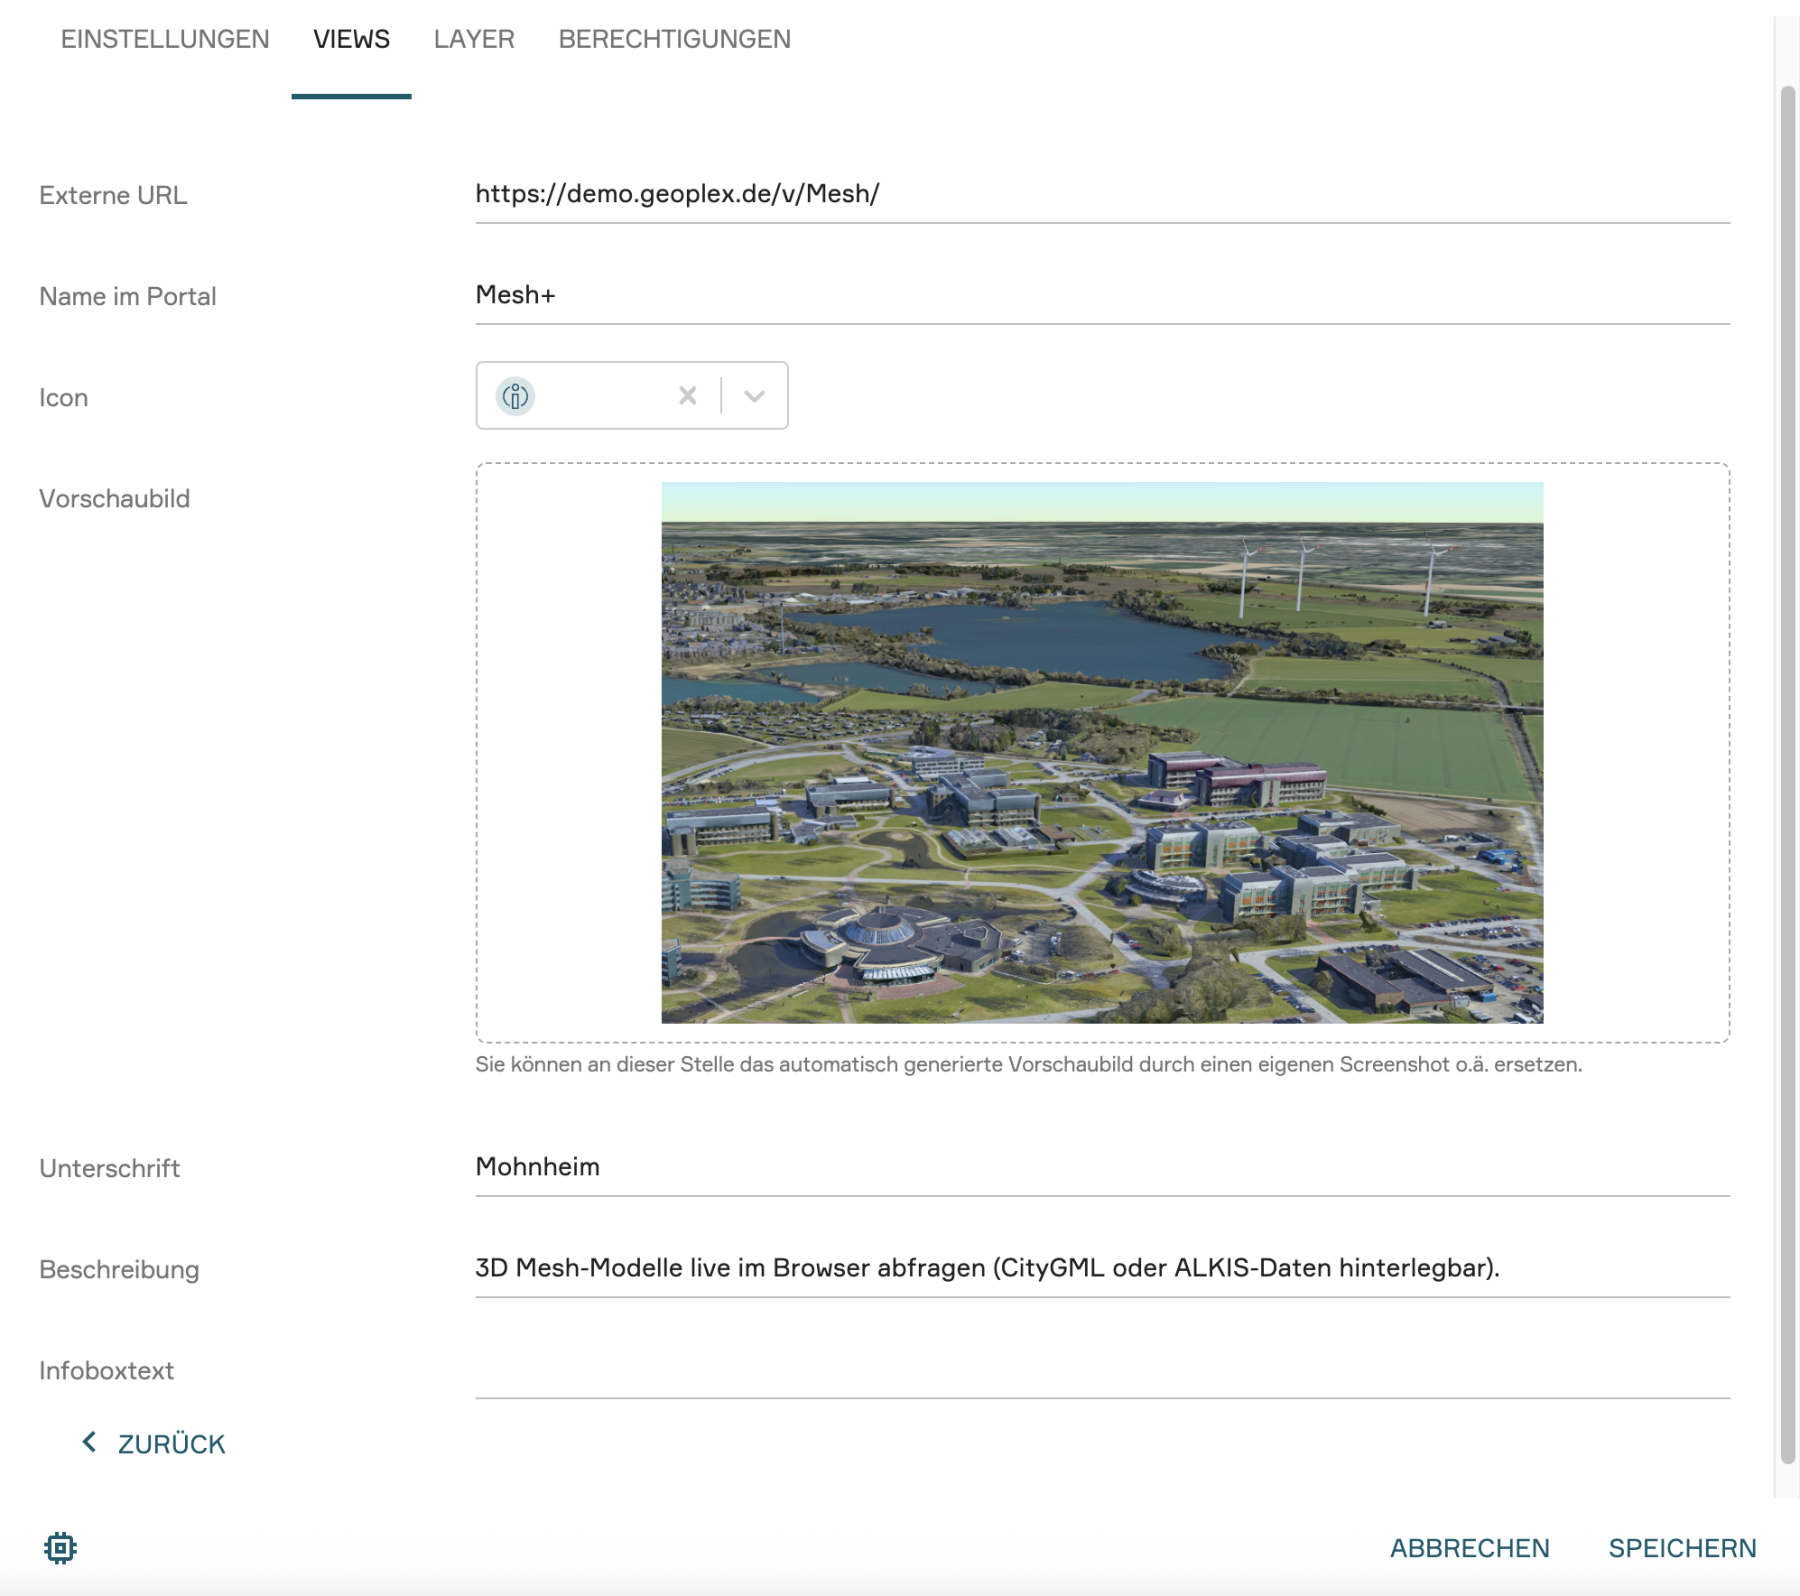
Configuration in the sub-menu: Once the external view has been created, the previously described sub-menu for the visual fine-tuning of the view card is also available here. As with the internal views, you can individually define the icon, preview image, headline, description, and infobox text, in addition to the external URL and the name in the portal.
4. Adding Layer Anchor
While you can access preconfigured views under "Maps" in PlexMap Portal, the "Search" area enables targeted searches for individual layers. Generally, all layers available in your PlexMap instance are searchable here. Using the user interface, users can also compile their own map views under the "Search" tab.
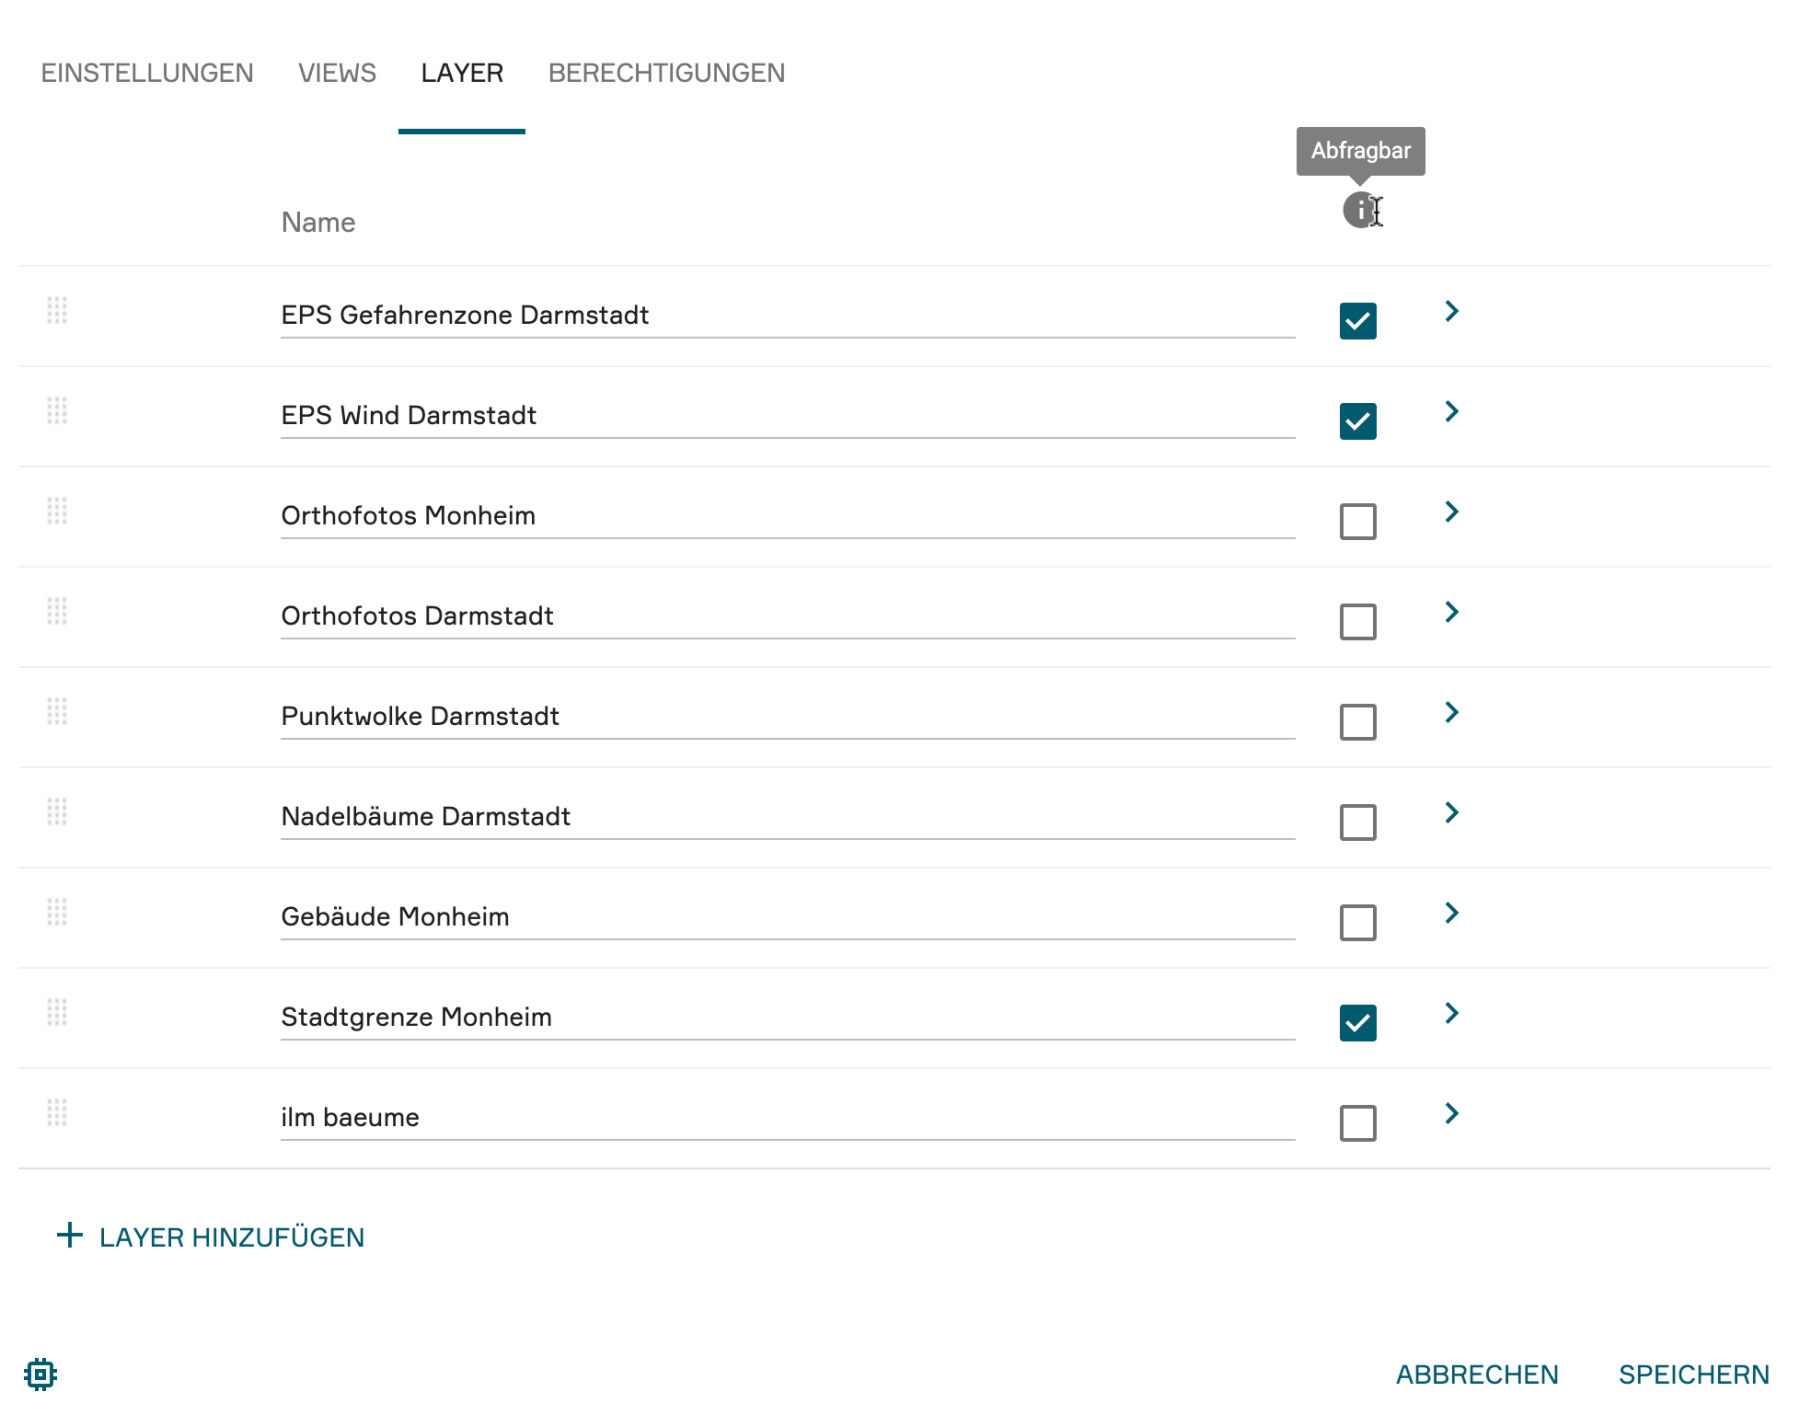
To add layers in the "Search" area, switch to the "Layers" tab in the portal settings. Using the "+ Add Layer" button, you can select layers from your PlexMap instance to be used in the "Search" area. The selected layer will then appear in the layer list above the "+ Add Layer" button.
Under "Name", you can assign a display name for your layer in the portal (e.g., "EPS Danger Zone Darmstadt"). If the layer should also be queryable in the portal later on, please check the "queryable" option.
Using the drag-handle button to the left of the display name, you have the option to change the display order of the layers in the portal. To do this, hold down the drag-handle button and move the layer to the desired position. Via the small arrow on the far right of each row in the layer list, you can access various settings for the display of your layer in the portal.
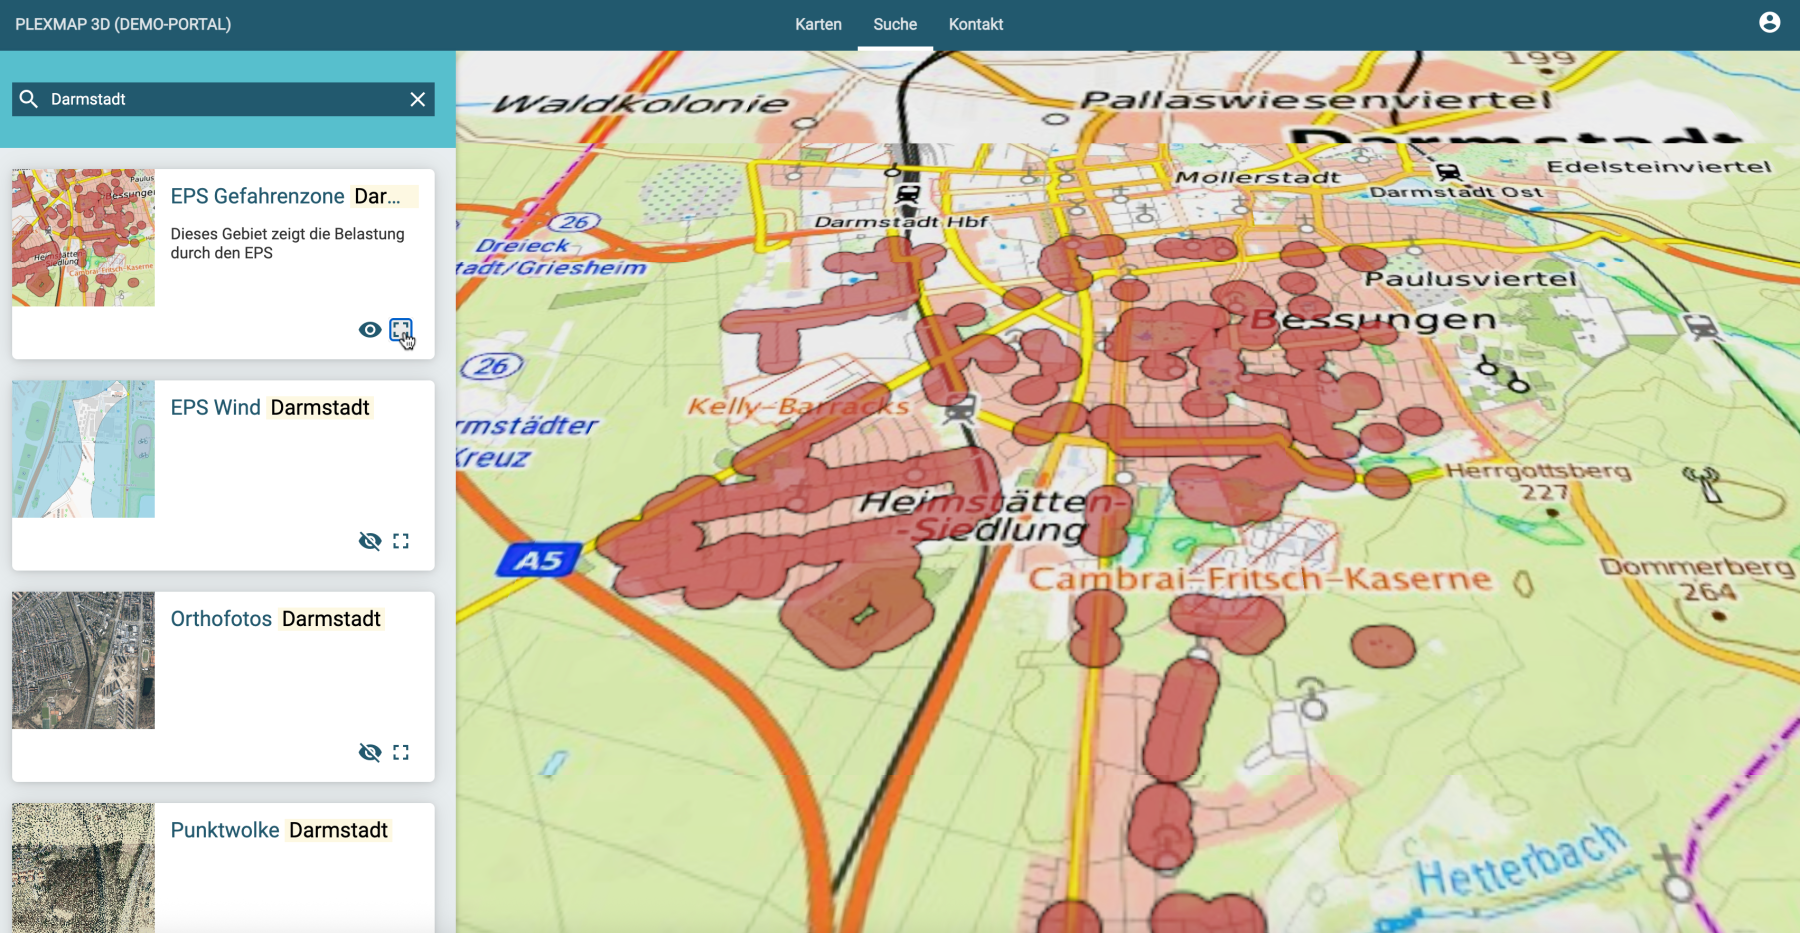
Once the configuration is complete, the layers appear in the portal under the "Search" keyword. In the map view that opens, all stored layers are listed on the left side.
The eye icon can be used to toggle the visibility of the layer, while the bounding box icon serves as a practical navigation aid to jump immediately to the spatial extent of the data.
For efficient research, the search bar at the top left offers the possibility to filter the list specifically by names or abbreviations. If the layers have been configured as "queryable" as described, users can view and analyze detailed attribute data directly within the view window.
Note:
If the layers should be public or accessible only to a specific user or user group, you must activate the corresponding permissions in the layer settings.
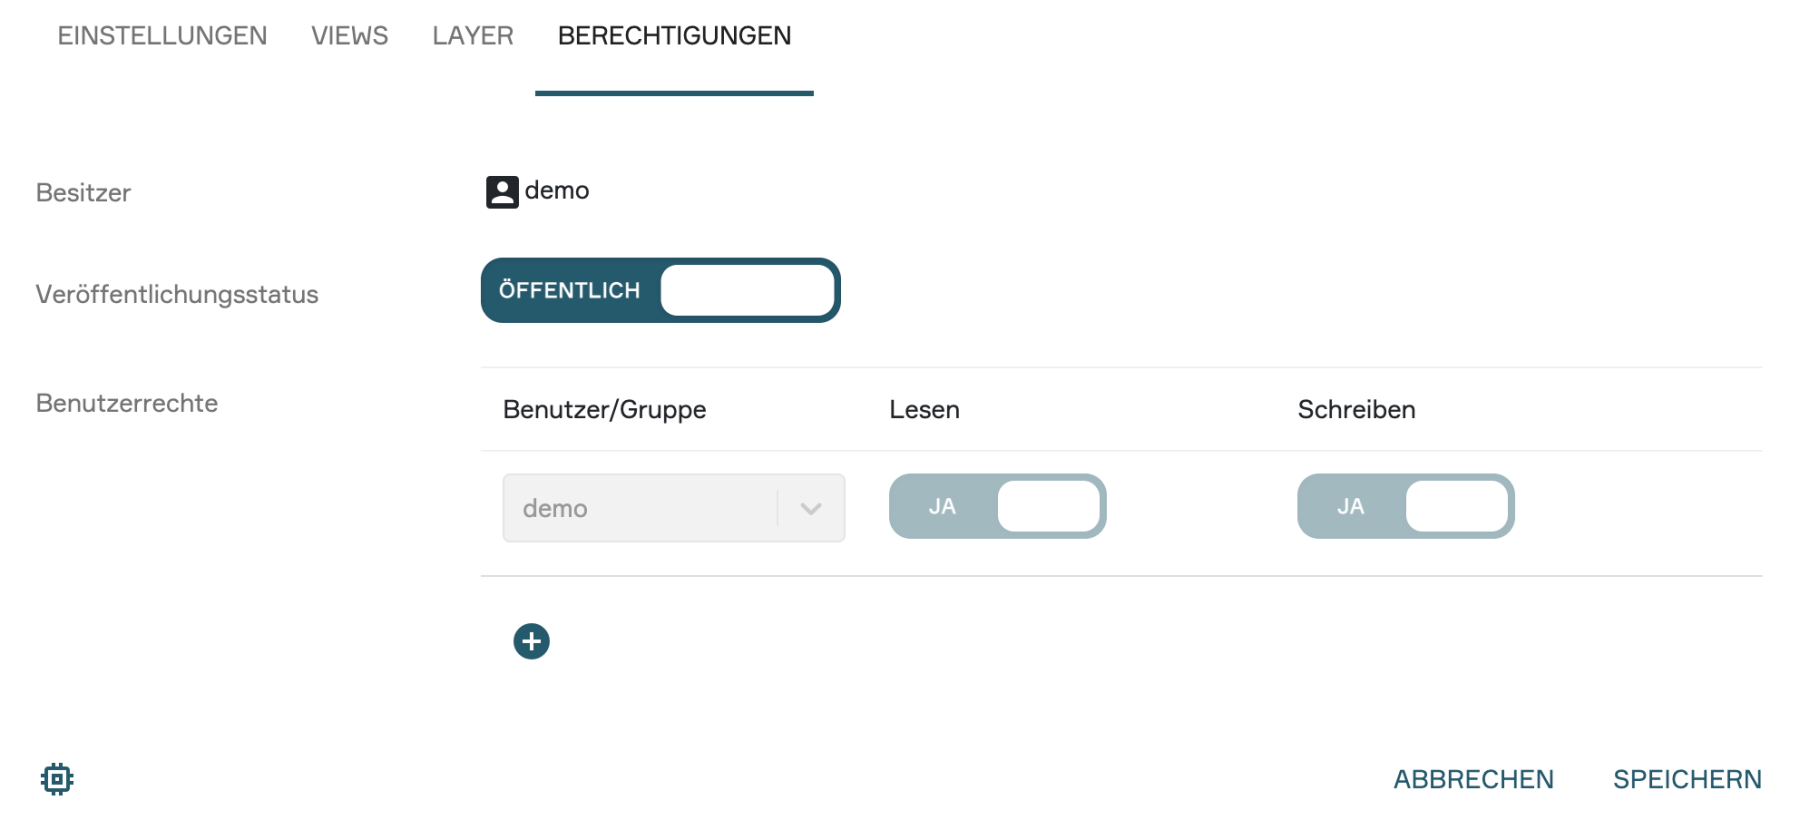
5. Permissions Anchor
The configuration of access rights for your portal is also carried out in the portal settings. The procedure follows the logic you are already familiar with from the View or Switchboard settings.
Publishing status:
Here you can control who can generally access the portal:
Public: The portal is freely accessible to all users via the internet.
Internal: The portal is only accessible to a restricted group of people.
User permissions:
Here you can define access rights at the user or group level in detail:
Read permissions: Here you configure which users or groups are allowed to see and use the portal.
Write permissions: Here you can assign other users the right to make settings in the portal, add content, or customize the design.